Traditional alarms are hard-wired into the home’s main electricity supply. However, wireless or part-wired systems are now widely available.
Wired Systems
Although these take longer to install, there is no need to worry about replacing or recharging batteries. Professional installers tend to use hard-wired alarms.
Part-wired systems
Some alarms require the control panel to be wired into the main electricity supply. However, many have the option to run off a built-in rechargeable battery and the panel can be removed and recharged at a power point when necessary.
Wireless systems
These can literally be set up in hours because there is no need for complicated cable routing and electrical connection. The PIRs, magnetic contacts for doors and windows, and the main control panel are all battery-operated, and the external bellbox is often solar-powered. The main drawback of wireless alarms is that batteries need replacing or recharging, although many systems give a prompt if maintenance is necessary.

Above: Complete wireless system. Comprised of: MAGNET FOR DETECTOR; MAGNETIC CONTACT DETECTOR; Movement detector; Key fob; PIR; REMOTE; CONTROL PANEL; Keypad
Installing Magnetic Contact Detectors
The detector should be located on the fixed frame and the magnet on the door or opening light of the window. With the wireless example shown here, batteries must be inserted in the detector before it's installed. Many contact detector kits are convertible in that they can be installed wired or wireless. The alignment and distance between the detector and contact is crucial, so the manufacturer’s guidelines need to be closely followed.
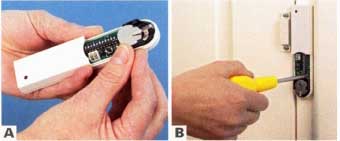
A. Insert battery into the main body of the detector.
B. Secure both detector and magnet in place on the door or window edge, ensuring that they are correctly aligned.
Installing a Battery-Operated PIR
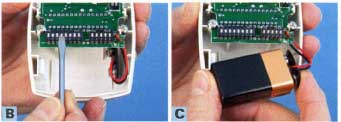
Once position has been decided securing a PIR in place is a straightforward task For hard wired systems cable connection and routing becomes necessary but for a wireless alarm, secure positioning and correct battery insertion is all that's required.
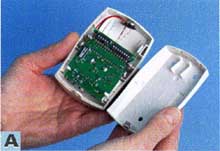
A. Remove the front cover of the PIR. You may need to undo a small grub screw in order to release the cover.
B. Some PIRs need to be set internally. This involves setting dip switches inside the PIR.
C. Insert the battery and replace the front cover.

D. Hold the base plate in position and mark pilot holes. Plug if necessary before securing in place.
E. Replace front cover. In the example shown here, a screw needs to be tightened on the underside of the PIR.
CCTV
These systems are becoming a more viable DIY installation task. Systems may either be linked to a separate monitor, or directly to your TV and be connected to a video recorder. The majority of systems use PIR sensors, and wireless options are available. When the PIR senses a movement, the camera transmits the image to a receiver unit that's connected via a cable to the monitor or TV. This automatic system can be bypassed by using the remote control. Follow the system manufacturer’s instructions to plan and install a CCTV system.
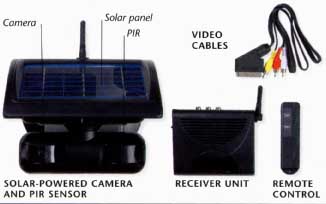
Above: SOLAR-POWERED CAMERA AND PIR SENSOR: Camera; Solar panel; PIR RECEIVER UNIT; REMOTE CONTROL; VIDEO CABLES