|
After cutting all the pieces, transfer the markings from the pattern piece to the fabric. For the notches, I make a small snip—not a V cut, just a 1/8-in.-long snip—on the edge (see image below). I know some very good sewers who never snip the edges but rather use chalk or thread to mark the notches. If you do choose to snip, remember to keep the snips small. For marks that are inside the edges—the dots, squares, and triangles, as well as darts and pleats—you have the choice of making tailor tacks or using other marking devices. (See “Tailor Tacks”). 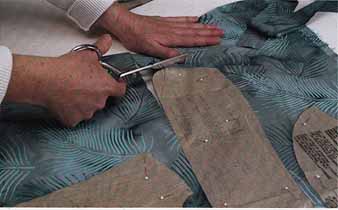
== Wiki Sewing ==
FABRICS -- Lace and Sheer Fabrics Aside from their beauty, lace and sheer fabric offer dimension, texture, and elegance to a sewing project. The new glitz and glitter sheers and netting can make projects more appealing to the eye. Watch for large lace patterns that may create awkward seams. Fold back two sections of the lace and see if joining them will be acceptable with normal sewing methods, and without advanced cutting work. Enhanced sheers are available with glitz, glitter, iridescence, and prints. Always test the appearance of the fabric from two directions to see if a with-nap cutting layout will be needed. TAILOR TACKS To make tailor tacks, take a 24-in—long piece of thread that's contrasting in color from the fabric you are using and fold it in half. Thread the two ends through the eye of the sewing needle so that there are four threads on the threaded needle. Do not knot the thread. Take a stitch where you want the mark to be—for example, at the tip of a dart, centered on a dot or triangle, or at the end of a buttonhole—through the pat tern piece and both thicknesses of fabric. Cut the thread, leaving a tail that's at least 1/2 in. long on each side of the stitch (top image, below). Pull the pattern away, then carefully separate the fabric pieces. Snip the threads, being careful not to cut the fabric (bottom image). You will then have a thread mark on all four sides of the two fabric pieces. 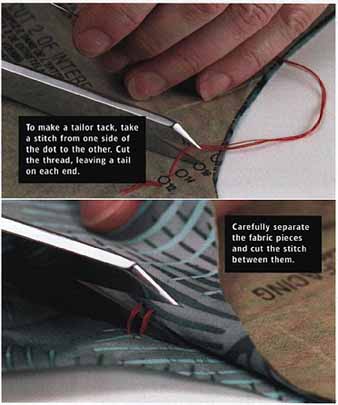
Sewing Basics -- A Quick-start GuideBefore you begin sewing, know about ...
|
| PREV: Layout and cutting | NEXT: Introduction to the sewing machine | Home |
Sunday, 2012-04-22 12:32