Inspecting a house for defects and problems is not difficult. The trick to making a thorough home inspection is to work systematically, from the bottom of the house to the top, and from side to side. You should record your findings along the way. The following sections will tell you where to look, and what to look for, as you move through and inspect each part of the house.
USE A SEASONAL APPROACH
Plan your inspection by scheduling a certain amount of time, then penciling in those times on the calendar. A complete home inspection is not that difficult because it can be done over time. Interior inspection and maintenance can be accomplished in the winter when the weather is cold. Outside inspection and maintenance can wait until the warmer weather of spring or fall.
Of course, there are some systems in the house that demand seasonal inspection. Consider the heating system for example. The time to inspect it's in the early fall before the cold weather sets in. This way, you have time to do the required preventive maintenance before it gets cold outside and you need heat. This will also give you enough lead time in case you discover any mal functions that require ordering replacement parts.
The air conditioning system is another component that requires a seasonal approach. Unlike the heating system, the air conditioning system should be inspected and , if necessary, repaired in the early spring so it's ready for the hot days of summer. Likewise a termite inspection should be conducted in the early spring because that is when the insects start to swarm. If the inspection is delayed until the winter, there is apt to be little or no sign of termite infestation (since termites don't nest in a house, but only forage there) and the homeowner may be lulled into a false sense of security.
ESTABLISH A PLAN
This book starts the home inspection at the foundation, because it's the sup porting structure for the whole house, but you can start the inspection any where and establish your own route. Just be sure to take notes as you inspect and record your findings as you progress through the house. Keep track of the areas covered. In this way you can stop anytime, then pick up again later as time permits, without having to worry about missing any nook or cranny in the house.
Unless you spot a major problem, such as structural damage—an electrical hazard, a plumbing leak, or insect infestation, to name a few—it is better not to stop for maintenance until you have completed the entire inspection. This way, you will be in a better position to compose a complete maintenance schedule and establish a list of matters that need to be addressed first.
USE YOUR SENSES
A house inspection does not require any sophisticated building skills or arcane architectural knowledge. Often it's only a matter of looking at surfaces and materials to see if they look solid and sound. In many cases, problems will be immediately self-evident: boards may be warped or split, masonry surfaces will have cracks, pipes will be leaking. These are visible signs. In some cases, you may get an audible sign, such as water dripping or a squealing drive belt around a drive motor pulley.
In other cases, your nose may alert you to problems that you can't see or hear. If you detect a strong musty odor it's probably caused by mold or mildew that has accumulated on hid den surfaces or in a wall cavity. If you smell the odor of ozone around an electrical component, it may mean there’s a loose connection that is arcing. Remember, if something looks bad, sounds bad, or smells bad, it probably is bad, and needs to be fixed!
Keep in mind, though, that it's not only important to find and correct a problem; in many cases, it's also important to find the underlying cause for that problem. This must also be addressed, otherwise the problem is likely to reoccur.
Although you really only need your senses—sight, hearing, touch, and smell—to locate problems, it helps to have a few other tools handy as you make your inspection. Probably the most important tool is a flashlight that can throw a beam into dark recesses you may find in the attic or basement.
Another handy inspection tool is a pocket knife. You can use this to probe wooden beams for structural soundness or dry rot. It can also be used to scrape rust or test the depth of crumbling concrete. The pocket knife is not used here as a repair tool, but simply as a diagnostic instrument to help you to probe and evaluate the extent of damage.
Goggles, a dust mask, and gloves will protect you if you venture into dusty places or if you want to examine fiber glass insulation. it's not necessary to wear them all the time, but they should be within reach if you need them.

INSPECTING A HOUSE is not difficult, but it should be done
systematically, working from the top down (or vice versa) and inside then
out. Make a list of all the areas you need to look at, and check off the
items on the list after you inspect them. Schedule outside inspection for
the warmer months and do the inside inspection when the weather is cold and you must remain indoors. Inspect the garage doors; Inspect the chimney flue;
Inspect all the locks on the doors and windows; Inspect the condition of
the roof; Inspect the insulation; Check the air and water quality; Inspect
the condition of the driveway; Inspect all concrete and masonry surfaces;
Inspect the windows, doors, and siding; Check the plumbing, electrical, and HAVC systems; Inspect the foundation for cracks and moisture.
FOUNDATION CHECKUP
The foundation is the link between the house and the ground. it's designed to support the whole house (a load that weighs hundreds of thousands of pounds) and hold it away from the ground so water and insects don't penetrate or attack the framing. In addition, the foundation is built so it can withstand the pressures exerted by the surrounding earth. It must do this for the life of the occupants and beyond.
In order to support the house, now and into the following centuries, the walls of the foundation must be vertically straight within marginal tolerances. The tops of the walls must be level and even, and the structural integrity of the masonry must remain sound. There is little the homeowner can do if the walls are not plumb (vertical) except call in a contractor to see if this is a serious enough problem to warrant correction. Still, a periodic inspection is important because it can help you identify smaller defects that could, if left uncorrected, develop into major problems that compromise the structural integrity of the foundation.
Fortunately, most small problems can easily be corrected by the average do-it yourselfer.
The three most common problems that occur with foundations are: water in the basement, damage to the mortar in the floor or walls, and insects or animals entering through the foundation.

WATER IN THE BASEMENT is usually caused by poor grading.
Check to make sure that the ground slopes away from the foundation. ½ inch
to a foot for at least 6 feet. Check the foundation for cracks or splaying
concrete, and repair defects as soon as possible. Puddles indicate poor ground
slope; Shrubs help to soak up ground water.
WATER IN THE BASEMENT
Water in the basement is usually caused by poor grading around the foundation (remedies for drainage problems are discussed elsewhere in this guide). The ground should slope away from the foundation, inch to a foot, for at least 6 feet. An easy way to check this is by walking around the house after a heavy rainstorm. If you see a number of puddles around the foundation walls, it's an indication that the ground is not graded properly.
Another common cause of wet basements is runoff water from the roof that is not diverted away from the foundation. Check to make sure that the gutters are clean and there is no blockage in the downspouts. The downspouts should be positioned so that rainwater is directed away from the house. Installing splash blocks can help.
House location can also be a factor. If the house is located at the foot of a hill, runoff water from the slope could penetrate through the foundation. The solution is to install a French drain to direct water around the house.
Inside the basement, check for moisture on basement walls. This may be caused by moisture seeping through the basement walls or from internal humidity condensing on the walls. To keep groundwater from entering through the basement walls, it may be necessary to seal the walls and possibly add a drain system.
Moisture condensing on the walls from humidity can be eliminated by improving the basement ventilation, either with fans or by installing a dehumidifier.

BASEMENT WINDOW WELLS can collect water during a heavy rainstorm and allow water to run into the basement. Install plastic domes over the
wells to keep out rainwater.
CRACKS IN WALLS OR MORTAR JOINTS
Inspect all the wall surfaces for developing cracks. Hairline cracks in the walls or in mortar joints are usually the result of the concrete settling. These cracks are natural and are no cause for alarm. However, they should be monitored to see if they open further. Wider cracks are caused by ground stresses due to excessive water pressure. These should be repaired. However, the cracks will reopen unless underground water pressure in the surrounding soil is relieved. This can be done with improved grading and drainage.
Another masonry problem caused by water penetration is splaying. The water seeping through causes the faces of concrete blocks to disintegrate. The solution, after correcting the water problem, is to chip away the face of the block and replace it with a paver tile.
INSECTS and ANIMALS ENTERING THE FOUNDATION
The foundation inspection should include checking and sealing all gaps around outside faucets and water pipes, telephone and television lines, electrical conduits, and vents—particularly the dryer vent—to prevent insects and animals from having an accessible path way into your house.
Termites and ants can be a trouble some problem, but so can animals and birds. When they nest in your home, they eat anything that they can get for food, destroy bedding and insulation for nesting materials, and leave fecal matter around the house. Once an animal lodges in the house, it's difficult to remove the creature. Understand that you can't kill animals or birds. Federal and state laws prohibit individuals from killing, trapping, or tampering with the nests of animals without special permits. The best strategy is to take preventative measures and secure the house so they can't gain entry.
Walk around the house and look for overhanging trees and shrubs. Cut back branches and limbs that might allow animals a path to the house. Look for any holes or openings in the walls or foundation that a small creature could enter. Remember that any hole, no matter how small, can be a potential entry point. Mice or birds, for example, can squeeze through a crack that is as small as 1/4-inch wide.
Put mesh screening over all exhaust vents. Block the gaps around water lines with steel wool, then caulk over them. don't rely on caulk alone to keep rodents out since they can eat through caulking.
Animals are usually attracted to a home because they find it a good place to make a nest and find food. Raccoons visit many homes to assault garbage cans. The best possible protection is place the cans in an enclosure that has a roof and latched gate. Place this en closure away from the foundation to keep the animals away from the house. If this is not possible, fit the garbage cans with tight-fitting lids and connect springs from the lids to eye hooks in the sides of the cans.
Mice and insects also like to make their homes in stacked firewood. Keep stacked firewood several yards away from the foundation to be safe.
FRAMING CHECKUP
The house frame is its skeleton. it's the wood structure that supports the floors, walls, ceilings, and roof of the house. Most frame problems are caused by the wood in the frame shrinking as it dries. These problems are relatively minor and easy to fix. Other problems may be caused by boards cracking under the weight of the house, or harm caused by dry rot or insect damage. These problems are more severe and , if not corrected, can result in major damage to a large section of the frame. If the frame deteriorates, part of the house will go with it.
Some parts of the frame, such as the joists and rafters, may be open and visible for inspection. Other parts of the frame, the wall studs for example, will be enclosed within wall board and out of sight. Nevertheless, these can be checked indirectly, because problems are apt to create defects in the walls, floors, or ceilings that enclose the frame. Knowing what to look for, and where, can help you to detect framing problems even though you can't see the studs, joists, or other members.

THE FRAME IS THE SKELETON of the house. Frame damage can
cause sections of the house to sag or even collapse. Inspect the framing
members for cracks, sags, and rot. Repair or replace all damaged timbers
as soon as possible. Double header over door; Roof rafter; Non-load bearing
wall; Sole plate; Non-bearing wall; Header joist; King stud; Jack stud
FLOORS
Unless you have a finished basement, the joists supporting the first floor are visible from below (and above in an unfinished attic). Make a visual check of all the joists and beams. First look for warped or cracked pieces. Distortion may occur as the wood dries and shrinks over the years. If this is the case, only one or two isolated boards should be warped. The solution is to attach another joist (called a sister joist to the cracked one and add additional support if necessary. It may also hap pen if the floor is supporting too much weight. The solution is to add more support from below. it's wise to consult with an architect to determine the best type of support to add.
Check the bridging between the braces. These are the diagonal cross pieces that span between the joists.
Over time, they shrink and loosen. The best remedy is to replace them if you suspect damage.
Look also for rot or insect damage. Unfortunately, this is not always apparent to the naked eye, because the core of the wood may be damaged, while the shell remains intact. Use an awl or sharp knife to probe the boards for soundness.
If pipes or electrical lines run through notches cut into joists, look to see that the notches don't exceed a sixth of the joist’s depth. Holes drilled to allow wires through should not exceed a third of the joist’s depth. The holes should be at least 2 inches from the edge of the joist. If this is not the case, nail additional bracing to rein force the joist.
Inspect the floors in all the rooms. This will give you some idea of the joists and subfloor beneath. If the floor boards are buckling up, it's an indication that the subfloor does not have enough clearance to expand or contract with humidity. The solution is to re place the subfloor with underlayment plywood (a major job and one best left to a professional).
If the floor bounces or flexes when you walk on it, the joists are spaced too far apart. The best solution is to add another support beam midpoint between the joists. If the floor bounces severely, it's because the floor lacks proper structural support. Consult a structural engineer for advice.

(top) IN AN UNFINISHED
BASEMENT, the joists can be inspected
from below. Inspect the joists and walls for gaps, cracks, and other warning
signs of structural problems. (below) INSPECT THE WALLS FOR CRACKS and gaps.
Also inspect for loose joint tape and loose seams in the wallpaper.
WALLS
Structural problems with the walls usually show up at the points where the walls meet with the floors, ceilings, or other walls. Look for gaps at the joints where the two surfaces meet. Often these problems are evident in the center of the house, because the central truss has less support and uplift forces are stronger. These forces are generated whenever the house settles or moves in response to ground conditions. Little can be done to counteract them except to make sure the ground around the house is properly graded.
Extreme fluctuations in temperature and humidity conditions can also cause gaps to open. They are most likely to occur in late autumn when the heating system is turned on and some framing members expand. The problem should correct itself by springtime.
In some houses, gaps may occur be cause the framing was constructed with unseasoned wood. As the framing members dry, they pull the ceiling up or distort the walls. Correct ceiling gaps by installing crown molding around the ceiling. Gaps around the floors can be closed by adjusting the shoe molding around the foot of the wall.
Other structural problems show up as cracks in the walls. The most obvious, especially in new houses, occurs in the walls directly above a doorway. These cracks are a natural result of a house settling. Tape over the cracks with fiberglass joint tape, then spackle.
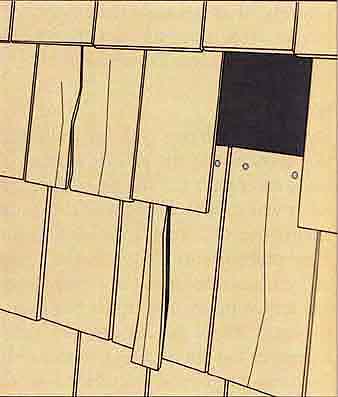
SIDING and TRIM CHECKUP
The exterior surface of the house is the first thing people see when they drive up. Realtors are quick to point out that good siding can add value to any house. Siding is more than cosmetic, however, it protects the house from the elements. Without it, rain and snow would penetrate and eventually destroy the framing. Insects and rodents would invade and nest in your home.
So, it's important to inspect the siding and trim yearly for defects like cracking, stains, dents, crumbling mortar (for houses with masonry) and missing pieces. Siding next to the roof, in corners, above windows and doors, and adjacent to the foundation decays first. Look carefully for the following problems in these areas and make the necessary repairs.
Before making any repairs, carefully read the warranty that came with your siding. When defects occur that are covered in the warranty, the manufacturer is responsible for making all the necessary repairs. Doing any repair work yourself could void the warranty.
If you have vinyl or metal siding, sight along the surface for signs of buckling or warpage. This usually hap pens at places where the siding fits into the trim or channels. If there is not enough clearance in the expansion gaps, the siding will buckle as the temperature changes. The way to fix the problem is by moving the siding. If this is not possible, remove the siding and trim it, then replace it.
WOOD SIDING
Wood siding is more problematic. Sometimes, as the wood dries, it shrinks and gaps appear at the butt joints. If the gaps are small (1/4-inch or less), they can be filled with caulk. Wider gaps indicate a moisture problem or major shifting. Consult with a contractor to determine the exact cause and the possible solutions.
Cracks may appear in wood siding as it ages. Repair by opening the cracks, filling them with glue, then clamping them shut. Drive and countersink galvanized deck screws on either side of the crack. Fill the holes with wood filler, then sand and paint.
Siding boards with larger cracks should be replaced.
Homeowners often neglect to inspect wood shingles and shakes be cause they are usually made of a decay-resistant wood such as red wood or cedar. These woods require less maintenance then other woods, but they can still develop problems. Left untreated, they often weather badly and become discolored. They can usually be restored with a commercial cleaner that is best applied with a pressure sprayer. Then it’s best to apply a wood preservative formulated for redwood to maintain the original appearance.
During your inspection, look care fully for missing shingles. Obviously missing shingles should be replaced. it's important to check the surrounding areas to make sure that the adjacent shingles are secure.
Rust stains on wood siding are caused when the nails holding the siding pop up and rust. The solution is to remove the nails and sand out the rust spot. Drive and countersink new galvanized ring-shank siding nails in place of the old nails. Fill the nail holes, prime, and then paint.
Paint problems on wood siding include blistering, peeling, cracking, and chipping. Blistering and peeling occur when moisture in the wood rises to the surface. Before attempting to repair the paint finish, find and eliminate the source of the moisture. Water may be leaking from the roof or gutters. If so, repair the gutters so the water drains properly. Another possible moisture source is from inside the house. The moisture in the air may be leaking through the walls to penetrate the siding. One way to release the moisture is by drilling holes in the siding and in stalling plug vents.
When the moisture problem has been solved, remove the paint to the bare wood, then sand, prime, and re paint.
Cracking or chipping is caused by too many layers of paint on the siding. Remove the paint to the bare wood, prime and repaint.
BRICKS and MORTAR
A white, powdery coating, called efflorescence, may crystallize on bricks. It happens because the moisture in the bricks evaporates and leaves mineral deposits behind. The powder can be re moved by brushing with a stiff brush and household cleaner. it's important to eliminate the source of the moisture (see above) or the problem will reoccur.
REPLACE SPLIT, broken, or missing shingles as soon as possible.
Carefully examine the surrounding shingles to make sure they are still firmly
attached to the wall.
In addition to looking at the mortar joints, look also at the bricks them selves. The most obvious defect is called flaying or flaking. Here flakes or chunks fall away from the surface of the brick. This may be caused by defects in the composition of the brick, or because the brick is absorbing too much water. As the water freezes and expands, it breaks up the internal structure of the brick. The only solution is to chisel out the damaged brick and replace it with a new one.
Even after the damaged bricks are re placed, it's important to protect the other bricks, because they could develop the same problems. The solution is to keep moisture from penetrating the bricks. If the moisture is entering the bricks from the interior side or from the ground below, you must eliminate the source of moisture. If rain or snow is being absorbed along the exterior side of the bricks you may be able to seal them with a brush-on masonry sealer (available in home centers) to make the bricks more water-resistant.
Inspect the mortar joints between the bricks by poking them with an awl. If the mortar crumbles, it should be chiseled out and replaced.
An exterior stucco surface will develop hairline cracks over the years. This occurs naturally as the house settles and the stucco reacts to the elements. The cracks should be sealed be fore water has a chance to penetrate, freeze, and expand and widen them. Fill the cracks with concrete caulk, feathering the edges to blend in with the surrounding surface.
STUCCO and TRIM
Another stucco problem that is more serious occurs when the stucco pulls away from the wall. When this hap pens, you are likely to see bulges in the wall in the places where the stucco is starting to loosen. Tap on the suspected area and listen for a hollow sound. This may mean that there is a gap between the stucco and the wall. The only course of action is to chisel out a small section to see if the stucco has broken free of the metal lath behind. If so, the rest of the stucco should be removed and replaced.

SIDING and TRIM SHOULD BE INSPECTED once a year for gaps, misalignment,
cracks and dents, and mold, mildew, and dirt.
Check the wood trim around the house. It may be damaged or rotted. This is caused by water penetrating through surfaces that are inadequately protected (this happens when the paint wears or peels away). Patch small areas with epoxy wood filler. Replace trim with extensive damage. Sand and paint all exposed surfaces.
Finally, check the areas where the siding meets the window, corner, or door trim. Gaps will occur as the materials expand and contract with temperature fluctuations. Clean the gaps and fill with an appropriate exterior caulk.
DOORS and WINDOWS CHECKUP
The logical place to inspect the doors and windows is at the entrance door. You will want to check the finish and look for gaps around the trim—all gaps should be caulked. Look closely at the binges; since they support the door, they should be solidly anchored to the frame.
DOORS
Consider how secure the entry door is. Many entry doors are made of wood, a few are hollow-core doors. Hollow-core doors invite heat loss and they offer virtually no protection against break-ins. For maximum security, replace all hollow-core entries with solid-core wooden doors.
Solid-core wooden doors are more formidable and are less likely to warp, however, they must be sealed or they will absorb moisture. This could cause them to expand a bind in the door frame. If you have a solid-core wooden door, inspect it carefully to make sure all surfaces have an adequate coating of varnish or paint. This inspection should include the edges of the door as well as the front and back faces. Perhaps the most important edge is the bottom of the door. it's hard to make a visual inspection of the door bottom because it's so close to the floor. You can try to feel if there is a film of finish on the bottom edge by slipping your fingers under it. You can also place a small flat mirror under the door and catch a glimpse of the bottom edge in the reflection.

LOOSE HINGES or hinges deep in the doorjamb will cause a door
to bind. Before planing the door, check the hinges.

TIGHTENING A HINGE SCREW is difficult if the holes have become
enlarged. Insert a glued dowel into the hole. Let the glue dry, drill a pilot
hole, then drive the screw into place.
If your front door is made of wood consider replacing it with one made of fiberglass or a metal door there are locks on the interior doors, make sure you can unlock the door from the outside. This will allow you to open the door and help someone, such as a small child or an elderly person, should they get locked in the room.
Open and close all doors to make sure they latch when closed. If the door does not latch properly, the lockset may need lubrication. Disassemble it, clean and lubricate the moving parts, then re assemble it. If the lockset is working properly, check to see if the bolt is aligning with the faceplate. The solution is to adjust the faceplate, but before doing this, make sure the hinge screws are tight. Loose screws allow the hinges, and subsequently the door, to sag.
During hot and humid weather, a door may not close properly because it has absorbed moisture and swelled. If this happens, remove the door and sand or plane all the edges until the door closes properly.
Check all sliding doors and bi-folding doors to make sure they open and close properly. If the doors stick or slide with difficulty, clean the door track with a toothbrush and a damp cloth, then lubricate the track and rollers with silicone spray. If this does not correct the problem, inspect the rollers to see if they need adjustment. A bent or worn mechanism should be replaced. Problems with bi folding doors can usually be traced to improper alignment; this can be corrected by loosening and adjusting the top pivot bracket.
WINDOWS
Look at the glass panes in the sashes. Obviously you will want to replace bro ken panes, but also look for cracks in the glass. Cracked glass is dangerous and inefficient because it allows cold air to penetrate through the window. Look around the edges of the glass at the condition of the glazing compound. It should form a continuous bead around the perimeter of the sash. If there are any gaps or cracks, replace the compound to keep moisture from penetrating into the frame.
After examining the glass, check the condition of the frames. Wooden with a fiber glass core. These doors are expensive but they offer solid protection against break-ins and they have good insulating properties. Metal doors should have a “thermal break” to keep the cold edges of the door away from the metal thresh old. Fiberglass or metal doors can also warp if they stand exposed to the hot summer sun. They will return to their original shape when they cool. You can minimize warpage by repainting the door a light color.
Inspect the door hinges. Entry doors are heavy, so they should be supported by no less than three sturdy hinges, and , of course, they should be fastened tightly to the door frame.
All entry doors should have a good lockset with a deadbolt. Exterior locks can collect moisture from rain and snow. Eventually, this moisture will cause the internal parts to corrode and bind. Protect external locks by lubricating them once a month. don't use graphite lubricants for this because the graphite will eventually collect inside the lock and gum up the works. it's better to use a lightweight machine oil (sewing machine oil is good for this job) to lubricate the locks. Place a few drops on the key; pull it in and out of the key slot a few times, then try opening and closing the lock a number of times.
Over time, some dirt and metal may collect in the oil film and make the lock a little sluggish. You can clean the lock with kerosene. Apply a few drops to the key and repeat the lubrication maneuvers to work it into the mechanism. This technique should be a part of the annual inspection.
The front entry door should be fitted with a sturdy chain lock so you can crack the door open, yet still maintain security. All entry doors should have weather-stripping to cover the gaps around the frame and a gasket or sweep on the threshold.
Next, inspect the interior doors. Unlike the entry doors, interior doors should not have weather-stripping. They should have a slight gap (at least 1/4-inch) at the bottom to allow for ventilation. If frames with worn paint or bare spots should be sanded and painted. Inspect vinyl clad or aluminum frames for cracks and warpage. Usually these defects can't be corrected, and it may be necessary to replace the sash.
Open and close the windows. If a window sticks, the tracks are probably dirty or coated with paint. Clean them with a stiff brush and damp cloth. Use soap to lubricate the channels or wood en windows, and silicone compound to lubricate metal window tracks.
Jalousie and casement windows have a crank mechanism to open and close them. The metal gears (do not lubricate plastic gears) in crank housings should be cleaned and lubricated yearly to keep the windows operating smoothly.
If a window fails or won’t stay open, the operating mechanism may be bro ken. This is usually a problem with older windows that have sash cords, pulleys, and counterweights inside hollow pockets on the sides of the window.
Look also for condensation build-up on the inside of the window. If condensation forms on the inside window, then cold air is coming around the storm window. It needs better weather stripping. If condensation forms on the storm window, then warm moist air is flowing past the inside window to the storm window. Add more or better weather-stripping to the inside window.
Inadequate weather-stripping can al so allow cold air to enter from the out side and create cold drafts. Slip a dollar bill under the sash and close the window. If you can pull the bill out from under the closed window, there is a gap that needs weather-stripping. You can also test for cold drafts by moving your hand around the perimeter of the window to feel incoming cold air. If either of these tests indicate the presence of incoming air, add weather-stripping.

INSPECT THE WINDOWS during the winter for signs of excessive
condensation. If warm interior air creeps past the inside window, condensation
will form on the in tenor side of the storm window. (Bottom) IF COLD AIR LEAKS
past the storm window, condensation will form on the interior side of the inside
window. Add weather stripping to the window to prevent the leaks of air.
ROOFING CHECKUP
The average roof is designed to last about 30 years; after that it begins to deteriorate and may need to be re placed. Some roofs last longer, others need to be replaced after a couple of decades. A good roof inspection is important to determine its condition, since making repairs is necessary be fore it’s too late.
Sometimes you can get an idea of the condition of your roof by looking at it from the ground with field glasses, but at some point you will have to climb onto the roof for a careful examination of all areas. A roof inspection can be dangerous because you will be high off the ground. Be sure to inspect your roof on a clear, dry day and wear shoes with nonslip soles. Read the caution panel at the end of this section and understand the risks of climbing on a roof before you venture up.
A typical roof is made up of several elements: the shingles, flashing, gutters and downspouts, the fascia, and the soffits. A thorough inspection should include all of these elements.
SHINGLES
Look at the shingles for damage such as buckling, cupping, cracks, or broken pieces. A few damaged shingles can be repaired or replaced but if there are large areas of damaged shingles, the entire roof should be re placed and reshingled.
During the winter after a snowstorm, ice dams may form. These dams trap water as it runs down the roof. Eventually the captured water works up under the shingles and penetrates through the roof into the attic. The primary cause of ice dams is inadequate roof ventilation. One way to prevent the problem is by adding soffit vents and a ridge vent to the roof. Periodically, check the soffits from inside the attic to make sure the vents are not obstructed.
Metal flashing will be placed around a chimney, vent, dormer, or even between two parts of the roof. Flashing keeps water from running under the shingles at those points. Inspect all the flashing to make sure it's sound. Corroded areas may be patched with roofing cement. Flashing with extensive damage should be replaced.
GUTTERS
Gutters and downspouts need to be inspected twice a year, in the early spring and late fall. In the fall, they may be filled with leaves. These should be re moved. Check also to see if there is evidence of tiny gravel in the gutter debris. Tiny gravel de posits come from deteriorating shingles and are a warning sign that the roof covering is wearing and may soon need to be replaced.

ICE DAMS OCCUR when the snow at the roof ridge melts into water.
The water freezes at the eaves and forms a dam to trap additional melt water.
This water will eventually seep through the roof into the attic.
In the spring, inspect the gutters to see if they sustained any damage from the winter snow and ice. Look to see if the gutters are sagging or leaking. Realign sagging gutters and replace the hanging strap to secure them in place. The gutters are attached to the fascia boards. Inspect them for cracks or rot. Replace the damaged fascia boards and remount the gutters with new hanging straps.
Gutters leak if the seams open up or if the gutter is rusted. Fix seam leaks by applying a liberal bead of caulk to the joints. Repair rust holes in the gutter with fiberglass and resin.
Inspect the downspouts for clogs and debris. Remove the obstructions by forcing a plumbers’ snake through the downspout or by directing a strong jet of water into the downspout with a gar den hose. Install downspout strainers and gutter guards to prevent future clogging.
Look at the ground around the outlet pipe of the downspout for signs of soil erosion or for puddles of water (after a rainstorm). These are indications that the runoff water is not being directed away from the house. Install splash blocks under all of the outlet pipes to divert the water.
Finally, it's important to examine the soffit boards for decay or rot. Decay and rot are caused by inadequate soffit ventilation. Replace the boards and install soffit vents for increased ventilation.

LEAKS FREQUENTLY OCCUR around the chimney because the masonry
settles at a different rate from the roof and the two pull apart. Check the
flashing around the chimney for wide gaps. Chim10.jpg PROTECTING GUTTERS:
USE A LADDER to inspect and clean the gutters. Placing a ladder against the
gutters can dent or damage them. Protect the gutters by using a ladder stay
or by placing a wide board across the top of the gutters.
INTERIOR SURFACES CHECKUP
In most cases, defects on the walls, ceilings, and floor surfaces are cosmetic and have little or no effect on the structural integrity of a house. Nevertheless, they stand out as eyesores in a well- maintained home. Often they are easy to correct, requiring only basic skills and a few simple tools.
WALLS
Start your inspection by looking care fully at all the wall surfaces. Look for dents, cracks, and holes in the plaster or wallboard. Look also at all the out side corners—these are especially susceptible to damage. Dents, holes, and corner damage are usually caused when someone accidentally bangs the wall with an object. Cracks are caused by movement in the house framing, and are a natural part of the settling process that a house goes through.
Look also to see if any wallboard nails have popped out or if the joint tape has worked loose. These problems are often caused by humidity changes in the air. All these defects can be remedied with spackling compound, joint tape, and , for larger holes, a wallboard patch.
Cracks and holes in traditional plaster walls occur as the house settles. Make these repairs with patching plaster, not spackling compound. A problem that is unique to plaster walls occurs when the plaster wall surface pulls loose from the lath behind it. This is caused by water dam age, vibrations, or as the house settles, and results in unsightly bulges in the wall surface. Small bulges can be fixed with plaster washers larger areas will have to be patched with gypsum lath.
If your walls have a covering, look for smudges or dirt spots, loose seams, holes and blisters. Smudges and dirt spots can be cleaned with a gum eraser or wallpaper dough (this can be found at decorating centers). Blisters and loose seams occur as the wallpaper adhesive deteriorates (this can happen with humidity or if it was improperly applied). Repair techniques require injecting adhesive under the damaged area, then pressing it flat.
Stan_502-0.jpg FIXING A SCRATCH: USE A WAX CRAYON in the appropriate shade to color in the scratches found on wood surfaces. PROTECT THE AREA by applying a coat of polyurethane. Repair immediately before scratches or gouges begin to collect dirt.

TO REPAIR LOOSE JOINT TAPE, tear away the loose section. Coat
the area with joint compound. Embed a new strip of tape in the wet compound and smooth with a wide taping knife. Allow the compound to dry, then apply
a covering of fresh joint compound over the joint tape. Smooth the compound
with the taping knife and feather the edges into the surrounding wall surface.
Sand, then prime and paint.
TILES
Another popular wall covering is ceramic tile. it's also used as a floor covering and it's usually installed in kitchens, bathrooms, and entryways.
While tile is durable and water-resistant, it can develop problems. The most common problems occur with the grout. Over time, the grout can discolor or crack. Discolored grout can usually be cleaned with commercial grout cleaners (available at tile supply stores). Cracked or crumbled grout is more than a cosmetic problem, because it al lows water to seep into the substrate behind the tile. The repair consists of removing the crumbled grout with a grout saw and installing fresh grout.
Although tiles are durable, they can be damaged if someone drops an object on the floor. Examine the floor and wall surf aces periodically for cracks. These can compromise the water-resistance of the wall covering, so the damaged tiles should be chiseled out and replaced.
HARDWOOD FLOORS
Hardwood floors should be examined for buckles, squeaks, and surface dam age. Repairing surface damage to hard wood floors includes removing stains, raising dents, and replacing damaged boards. Stains that penetrate into the wood are best removed with a commercial bleaching agent. Bleaching agents can be toxic so read and follow all directions carefully when applying them.
Scratches can usually be fixed with a wax furniture crayon. Shallow dents can sometimes be raised by covering them with a damp rag, then pressing the area with a hot clothes iron. For deep dents that can't be raised or large cracks in a floorboard, the only remedy is to cut the damaged section out and replace it with a new piece.
CARPETS
Inspect all carpets for stains and burn marks. Stains should be removed as soon as possible before they have a chance to penetrate the carpet fibers. If you discover a stain in your inspection, try removing it with a commercial car pet cleaner. In some cases, these products can affect the color of your carpet so always test them in a small inconspicuous area of the carpet first.
Sometimes the only way to remove a stain that resists cleaning is by cutting the stained area out of the carpet and replacing it with a new piece. If you have scraps of carpet left over from the installation, you can make the patch from this. Otherwise you will have to cut a patch from a hidden area like under the couch. it's essential that the patch matches exactly the shape and dimensions of the cutout piece, or the re pair will be obvious and unsightly.
RESILIENT FLOORING
Resilient flooring is a sheet flooring material, as opposed to individual tiles, that is made of a flexible material like vinyl. It ranges in thickness from 1/16 inch to 1/8 inch, and is usually bonded with an organic adhesive to an under-layment. In some installations, the adhesive covers the entire surface of underlayment. This is called a “full-spread installation.” In a “perimeter spread installation,” the adhesive is applied around the edges.
Resilient flooring is an ideal floor covering in areas where water may be a problem, like the kitchen. Since there are no gaps or seams, it's relatively easy to keep clean. Problems occur when the flooring starts to wear. Some resilient flooring materials have the same color and pattern throughout the entire cross section and are less likely to show wear and tear. Other, less expensive materials, have the color bonded in a thin layer to the top of a backing. When the top layer wears, the backing is exposed and signs of wear are evident. When this happens, the only remedy is to replace the floor covering. Before replacing the flooring, check to see if it's still under warranty.
Inspect the resilient flooring by looking for rips and tears in the material. These can sometimes be mended by forcing adhesive under the flooring through the tear. Place a weight on top of the tear to secure the edges until the adhesive sets. You can also make the re pair by cutting out the damaged section and fitting in a new patch—provided you have spare flooring material to use for a patch.

Fixing a Gouge: TO FIX GOUGES in a wood surface, begin by
applying crack filler with a putty knife to the area you want to repair.
CHOOSE A STAIN THAT MATCHES the surrounding wood and apply an even coat to
the arena. SAND THE REPAIRED PATCH and then apply a coat of clear polyurethane
to seal the repair.
Look around the perimeter to see if the edges of the flooring are still securely attached to the underlayment. If not, use a putty knife to force adhesive under the flooring; then place a weight on the edge to hold it down while it sets.
GARAGE CHECKUP
The garage is a relatively simple structure. The garage inspection consists mainly of checking the door mechanism and looking carefully at the drive way leading up to the garage. This does not mean that the roof, walls, and floor should be ignored, but inspection procedures for these are the same as for the house, and the reader should use those sections as a guide for checking out these parts of the garage.
GARAGE DOORS
There are three types of garage door mechanisms: extension spring lifts, torsion spring lifts, and swing-up doors. Check all the moving parts for loose bolts, nuts, or screws. Replace any bro ken or missing parts. Look carefully at the lift cables for signs of fraying. Open the door to see if it sticks or jambs. Also check to see that the door remains open at any level between 8 inches above the ground and 8 inches below the head jamb. If not, adjust the spring tension. don't adjust the tension on a torsion spring lift.
DRIVEWAYS
Unless an asphalt, or blacktop, drive way is properly sealed to keep rain water from penetrating, the surface will eventually crack. Inspect the driveway every spring to see if cracks are forming. If so, they should be filled with a commercial filler. These cracks may seem minor, but they can deteriorate quickly when winter water enters, freezes, and expands. Larger cracks and holes should be filled with asphalt re pair compound. Every three years, apply a sealer to the drive way to fill all hairline cracks and make the asphalt water-resistant.
Concrete is more durable than asphalt, but cracks can still expand into fissures or holes. Inspect the concrete driveway yearly. Fill cracks and patch holes as soon as possible.
Another problem that occurs on concrete surfaces is scaling and flaking. Here, the surface material breaks loose from the aggregate particles. This results in a smooth surface in some areas and a coarse surface in others. This is usually caused by a poor concrete mix rather than external conditions. The only practical solution, short of replacing the entire driveway, is to apply a thin-bonded overlay on the drive. This is a coating that will seal the concrete.
Another problem that can occur on a concrete surface is a popout—a fragment of concrete that breaks away from the surface to leave a depression be hind. They are caused when a piece of porous aggregate within the concrete absorbs water, expands, and creates enough pressure to force the fragment out of the mix. Popouts are not cause for alarm—provided they are not numerous—because they are an isolated defect and will not affect the overall integrity of the material. Repair popouts by drilling out the aggregate then filling the hole with an epoxy mortar.

CHECK GARAGE DOORS WITH AUTOMATIC OPENERS to make sure they close
properly. If the door doesn’t open, push the rear limit switch bar. Check the
rollers and spindles for damage and lubricate both with lightweight oil. Check
the cables on all doors for frayed or broken wires.

TEST THE ELECTRICAL EYE by blocking the beam between the safety modules as the door closes. The door should stop and reverse. If not, check all the connections.
Previous: Introduction to
Homeowner Inspection
Next: Inspecting the Systems