When we think of the kitchen, all sorts of fantasies come to mind: soup simmering on the stove, bread baking in the oven, and a cherry pie cooling on the windowsill; family breakfasts ala “Father Knows Best,” with stacks of perfectly formed pancakes served to beaming, well behaved children and a happy husband, complete the fantasy. Everything is mysteriously but perfectly stored in some miraculous place, where the happy cook can reach anything s/he wants in a flash.
Reality, alas, presents another picture altogether. More often than not, the storage and counter space seems to evaporate until there’s very little, if any work space, and the storage space is woefully inadequate to contain the kitchen paraphernalia that may or may not get used by the chief cook and bottle washer.
Traffic in the kitchen also affects the efficiency of the room. If the back door leads into the kitchen, the kitchen table can actually add to the chaos as it, too, becomes a storage drop spot. If the family tends to come into the house through the back door, you might want to set up a rolling basket system for family members to drop their paraphernalia when they come in the back door. These systems contain several baskets so that each family member can claim a basket of his or her own (label the baskets to avoid confusion). This personal basket system provides a place for everyone to drop their gear — from mittens to schoolwork to keys. It takes up minimal space and can be placed near the door (its portability leaves placement up to you — base your decision on the traffic). The kitchen table can then be used as extra work space if you are short of counter space, and it can then serve its original purpose as a dining table for family meals or quiet cups of coffee over the morning paper. If there’s simply no room for this basket system, you can at least tackle part of the problem with hooks, a mug rack, or a peg board system, that family members can use for anything that is hangable, such as keys and handbags.
Many people like to carve out a corner in the kitchen for paperwork — menu planning, family scheduling, and/or bill paying. This seems like a good idea at first, until bits and pieces of paper start to infiltrate other areas of the kitchen, often to be lost or buried in piles of mail or notes.

This tilt-out sink tray uses space that might otherwise be ignored.
A small kitchen office works only so long as you limit what goes on there (remember, a kitchen is not really an office). Menu planning and a calendar with the family’s schedule can easily be accommodated, but once you start paying family accounts and trying to keep other financial or personal records in that small area, you may find you need more storage space than you have. Shelves on the wall can be helpful, as can rolling wire file bins that can be pulled over to the work area. But once that allocated storage is used, rather than let the paperwork spread to other parts of the kitchen, look for an area in another part of the house that can be turned into a small home “office.” For instance, a desk and a two- drawer filing cabinet in a bedroom or family room nook, the dining room, or even the laundry area could be an alternate solution for domestic paper processing and storage.
What is the purpose of your kitchen? Assuming that the purpose is to prepare and/or serve food in that room, you’ll want to evaluate how the room is used now and eliminate anything that is being stored there — either temporarily or permanently — that doesn’t have to do with food. Once you’ve done that, go through everything else, keeping only what you need and actually use on a regular basis. Next, store those items close to their point of use. Rarely used items (such as the turkey platter) can be stored in upper cabinets or at the back of very deep lower cabinets. Fox example, if you rarely bake, there’s no need to keep the baking pans in the front of the pots and pans cabinet; but if you love baking, you’ll want to establish a “baking center” with all of your baking pans and accessories in one storage area as close to the oven as possible.

Kitchen cabinets can be outfitted with accessories to handle almost
any type of storage requirements. Here pull-out and round-table shelving
makes everything in the kitchen easy to store and retrieve. Other space-saving
features include the knife rack, cookbook holder, and spice rack that
are mounted under the up per cabinets and folded up when not in use.

This island serves several purposes, providing both countertop
and storage space.
Counter Space
If you lack counter space, you can give yourself instant extra space by installing a shelf (either stationary or one that folds down when not in use) on the wall next to (for example) the refrigerator. You can also give yourself a small piece of instant temporary work space by placing a cutting board over an open drawer or over the sink. (Manufacturers even offer special sink-top models.) Or you might want to put a work station near the area where you need the extra counter space. These work stations can be portable (equipped with casters, they are also sometimes called kitchen centers), so that they can be moved as needed. If you need more counter space near the stove when cooking, move it closer to the stove; if you need more space daily next to the refrigerator, position the work station there. These units also afford extra storage space for everything from cookbooks to appliances, cook ware, or kitchen linens.

If you are short of storage space for cookware or appliances,
a cart can give you extra space for those items and provide more room
for food preparation as well.
Space permitting, islands, which are fixed and larger than the portable work station, can also offer extra counter space as well as substantial storage underneath the worktop area. This storage area can be ideal for baking or casserole dishes, or can serve as a home for appliances that are not used on a daily basis. If the kitchen floor-plan allows it, extra dining space can be added to the kitchen for eating and snacking simply by running a counter around at least one side of the island to create an eating nook, with stools for seating.
Appliances
In our quest for labor and time-saving devices, we often grab for the newest fandangled gad get on the market, and once it comes home to the kitchen, we have a hard time figuring out where to put the thing. Many are more complicated than anticipated, most require electricity, and all need storage space as well as work space for when the appliance is actually being used. Unfortunately, the average kitchen has a shortage of outlets, counter or work space, and storage space — all needed for the care and feeding of our appliances. Because of this, one by one, the appliances get stuffed into the back of the deepest kitchen cabinets, rarely to be retrieved because, on the rare occasions that you need the thing, it’s just too much trouble to dig it out and put it away again.
Reevaluate your appliances, and give those almost never used ones to charity. Now is also the time to deal realistically with broken appliances. Either get it fixed so you can use it, or send it to a charity that repairs items for resale to benefit their cause.
Appliances that you use regularly (such as the coffee pot) can be put on the counter or on a portable kitchen center (look for the centers that feature electrical outlet strips so you can store and operate more than one appliance on the center). Some manufacturers now make appliances such as coffeemakers, toasters, and can openers that can be mounted under wall cabinets, so your countertops remain clear for other food preparation activities.

Another way to free up counter-space is to use appliances that
can be permanently mounted on the upper cabinetry.
Miscellaneous attachments and parts should be matched up with the correct appliance, and if possible, be kept near that appliance (you can get a rack or hanging pocket holder for food processor blades, for example, and these could be stored in a cabinet near the processor, rather than putting the blades dangerously into the utensil drawers). If you have a substantial number of appliance cords and attachments, store them in a drawer by them selves, or in a labeled box in the cabinet.
Pantries, Cupboards, and Shelves
Although pantries and cupboards initially seem to offer enough storage space in the kitchen, often they are inadequate as things get shoved into back areas to be lost and for gotten, while new things vie for what little space is available in front. One of the best solutions to this problem is to restructure the interior storage so that everything that’s stored there can always be brought into full view. This also makes it easier to keep cup boards and shelves clean, and can save time when you’re trying to put a meal together in a hurry.
Another solution is to add shelves in areas you hadn’t previously considered, such as a small shelf directly under an upper cabinet. Or sometimes you can double your current interior shelf space by adding another shelf in areas where shelves are traditionally too far apart. Turntables and other organizers can add the final space-saving touches to this valuable interior storage space.
Canned Goods and Staples
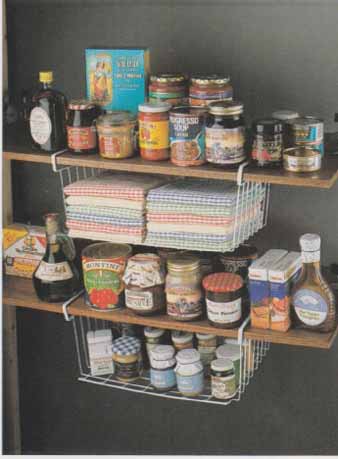
Canned goods are usually stored in either a pantry or in a cupboard that has been allocated for that purpose (next to, say, the pots and pans cupboard). If you are contemplating a complete renovation of your kitchen cabinetry, consider the wide variety of custom swing-out cabinetry now available. These de signs will store more than the average cup board or pantry shelf; with a touch, they bring the items into full view, providing easy retrieval and storage. You con give yourself instant extra shelf space with these handy clip-on wire baskets.
If you are not customizing your cabinet interiors, you can still give yourself more storage space with over-the-door racks, tumbles (these will only work with lightweight items), and shelf extenders. Check your shelves for depth and height, since often the simple addition of a shelf can make all the difference. Try a graduated shelf in a too deep cabinet or install a second shelf in a cabinet that has double the height necessary for canned goods. Not only do these additions bring the food into view, they make retrieving and putting the items away a simple, efficient task.
Staple ingredients do best if they are put in containers before being stored in the drawers or cabinets. The containers will save space, and also keep bugs out of things like flour and corn meal. Manufacturers of food storage dishes have started making modular see- through containers that are perfect for cereal, flour, sugar, and the like. They can be stacked easily, and make the most of whatever shelf space you have, particularly since you can stack a combination of tall and small sizes to make use of the extra height between some cabinet shelves. Potatoes and onions might be stored in stacking or rolling bins, baskets, or drawers. Hanging vegetable baskets could also accommodate small fruits and vegetables attractively out in the open where they are easy to get to. Odd-shaped corner cabinets with very little real storage will often hold a bin, basket, or small round trash can to accommodate potatoes and the like.
As you carve out these special food storage areas, remember to put the foods as close to their point of first use as possible. Ideally, cereal should be located near the cereal bowls, potatoes and onions should be near the sink for peeling, pasta near the stove, and flour and sugar near the oven or baking center. It’s not always possible to put every food item next to where it is used (canned goods often are in a pantry that may not really be near the stove), but wherever possible, and especially for items used in everyday cooking and eating, if you can design your storage setup to match your work areas, you’ll save yourself steps and make preparing food a much more pleas ant experience.
Dishes
Many people have enough dishes hidden be hind cabinet and hutch doors to outfit an army. If there are four people who normally eat meals at your house, two complete sets of dishes for twelve, thirty-six assorted glasses, and who knows how many mugs, are more than you will ever need. Select one set of dishes to use every day and store them near the dishwasher so that they are easy to put away after cleanup. Glasses should be near the sink if possible, and ideally, the coffeepot should be placed near the cabinet that holds the coffee cups.

These instant bag and wrap organizers can be mounted inside a
cabinet or pantry door or on a wall in the kitchen for easy access and
simple storage.

Shelving and swing-out units can be put to efficient use in the
pantry, nearly doubling the storage capacity in this area.
You can increase your storage space for your dishes by installing cup hooks inside the cabinets as well as underneath the cabinets. Consider installing just a few hooks under the top cabinet near the coffeepot for hanging mugs — they’ll be easy to grab for coffee, and you’ll have more space inside the cupboard for the other dishes. Or add a shelf inside the cabinet (you can buy instant shelves that require no carpentry for installation), and put plate racks in the cabinet to maximize the storage capacity. Good dishes that are not used very often can be stored on upper shelves, and if you want to spare yourself the chore of washing all of them before you use them, your best bet is to store them in quilted or plastic dish caddies inside the cupboard.
Utensils and Gourmet Gadgets
Kitchen utensils multiply mercilessly until there are drawers full of spatulas, can openers, wooden spoons, wire whisks, spaghetti twirlers, pastry blenders, egg beaters, corn- on-the-cob holders, meat thermometers, and dozens of whatchamacallits and assorted thingamajigs. To make matters worse, duplicates pop up all over the place; appliance parts that you suspect (but don’t know for certain) belong to the blender, food processor, and/or pressure cooker complete the mess.
To counteract this proliferation and open up some immediate storage space, first get rid of unnecessary duplicates and other utensils that you never use. With the purpose of the kitchen (preparing and eating food) fixed firmly in mind, go through your flatware and clear out anything that does not actively con tribute to the business of daily cooking and eating. Unless you have dozens of family members chowing down at your place every day, you won’t need three sets of flatware. Pick what you’ll need and use and store it in a cutlery tray in a drawer near the dishwasher or the sink.
Cooking utensils can be stored either in drawers, containers, or on wall-mounted racks, pegboard systems, and grids. When you are selecting a storage method remember to keep items as close to their functional area as possible. Keep knives near the cutting board and cooking utensils near the stove. Rarely used items (like the turkey baster) can be stored in out-of-the-way drawers or cabinet spaces for retrieval on the few occasions that you use them. Utensils that are used regularly can be stored in drawers with dividers or cutlery trays. Knives can be stored (with caution, especially if you have children) in a knife block on the counter near the stove, or on the kitchen work center or island. Another option is a wall mounted magnetic strip knife rack placed near the cutting board. Often used wooden spoons and the like can be stored up right in a ceramic jar either on or adjacent to the stove or work area. Many utensils such as spatulas and large turning forks have a hole in the handle so they can be hung on hooks, pegs, or pegboard or grid systems on the wall. If you only hang what you use regularly, there will be no need to worry about the utensils getting dirty since they will be washed so of ten that there won’t be any dirt or grease build up.
Once you’ve cleared out the clutter and creatively organized and stored the remaining utensils, remember that in the future, unless you are the world’s most accomplished cook, you won’t need to increase your utensil inventory beyond the basics that you already have on hand. After all, Grandma was a great cook, and she didn’t have all of those utensils and gadgets, so why should you?

Making use of wall space over the counter can free up more counterspace
for food preparation. Here wall-mounted dry food storage, utensil organization,
and paper towel and waxed paper holders free up not only counter space,
but drawer and cabinet space as well.

Pots, pans, and baking equipment can be more organized and accessible
when stored on these pull-out storage trays.
Pots and Pans
There’s never enough storage space in the kitchen, it seems, for the pots and pans. They’re stacked in an unmanageable heap (sometimes alongside small appliances) on the one or two available shelves in the lower cabinets. To make the best use of the storage space available for not only the pots and pans, but also the bakeware, casserole dishes, and mixing bowls, first, get rid of all of the old pots and pans that you never use. Remaining special trays, molds, and pans that get used only at holiday time should be moved to the hinter lands, such as the cabinet over the refrigerator or stove. This storage space can be in creased by adding shelves either horizontally, or vertically. Trays and flat pans can then be stored, divided by the shelves, one or two at a time. This puts an end to storing those items in ever collapsing piles. (You could also turn the cabinet over the refrigerator into a wine storage rack by installing dividing shelves designed to hold the bottles.) Check odd- shaped and corner cabinets for possible storage or unusual or rarely used items as well; these spaces can often be customized to hold trays, bakeware, or other pots and pans (such as that stew pot) that could use their own special storage niche.
You can make storing your remaining everyday pots and pans and other bake and cookware less aggravating by installing pull out shelves in the cabinet which insures that the equipment is easy to get to and put away.
Another option is to hang the pots from a ceiling pot rack, or from a pegboard or grid and hook system near the stove. Or you could hang your pots and pans inside the pantry door, providing there is enough clearance between the pots and the shelves, and so long as the door is thick enough to accommodate the hooks.
Recipes and Cookbooks
Recipes come into the kitchen via magazines, newspapers, friends, relatives, and cook books. Cookbooks are easy to deal with so long as you buy and keep only those cook books that you intend to use, and store them on a shelf rather than on the counter where they just get in the way. Watch the weight of these books; if you mount a shelf on the wall to hold them, it will need to be sturdy, or you’ll risk having it pull down from the weight of the books. If you have too many cookbooks to store in the kitchen, put the excess on a book shelf elsewhere in the house, or better yet, photocopy your favorite recipes and give the books away.
The other recipes aren’t quite so simple. Recipes clipped from magazines and newspapers commingle with those time-honored, much-loved recipes from Grandma and your mother-in-law. Rarely do these recipes get used, since digging through the piles of clip pings is almost always too time consuming to be considered; they just take up valuable kitchen storage space. To reverse this storage sapping trend, you’ll need to follow the first rule of recipes which is that unless you are going to put your clipped recipes in order, and follow up by actually using those recipes on a reasonably regular basis, don’t clip them in the first place. Because if you do, that one bulging drawer of yellowing, never-used recipes will multiply to fill two or three drawers that you could be using to store something else that you actually use.
For those recipes that you do want to use, you make your own personal cookbook that you can store on the shelf with the others. Simply enclose recipes in plastic sheet protectors (available at stationery stores) and put them in a three-ring binder by category (i.e., entrees, desserts, soups, etc.). This binder makes it easy to keep the photos of the recipe with the recipe — even if you have to use two pages. Simply put the picture in a sheet protector, and put it in the binder to the left of the recipe. Your customized cookbook can be expanded or weeded out at any time, and will be easy to keep clean. It’s simple to add recipes to the proper category, and if you wish, you can snap one of the sheet protector recipes out of the binder and work from that one easy-to-clean page, eliminating the need to have bulky books on the counter while you are cooking. If your recipe collection is extensive, you might want to have separate binders for separate categories. This book takes care of all recipes, whether they’re on scraps of paper or an entire magazine page, and, when shelved, can open up substantial drawer space in your kitchen.
Spices
Spices clutter up the cupboards with small and large tins and bottles vying for what little space there is in the first place. Cooks in a hurry tend to put the spices that are most of ten used in the front, and conveniently forget everything behind the front row. If you haven’t used a particular spice for a long time, and can’t think when you will, get rid of it.

This drawer has been fitted with a spice tray insert to keep spices
neatly organized near their first point of use — the stove.
Spices that are kept and used regularly should be stored either alphabetically or by category (in groups like baking spices, herbs, curry spices, etc.). You can put them on turn tables in the cupboard nearest the stove, or you can install a narrow shelf under your up per cabinets, over the counter. Since spices require minimal depth for storage, this shouldn’t interfere with your counter space. You can also install a shelf or two on the wall near the stove. If you purchase a spice rack, either wire or wood, it should accommodate round glass jars as well as oblong tins (if you use them). Another solution is to turn a drawer near the stove into a spice section, putting it into the drawer. The spices are then laid into the drawer, with the steps providing support and division for the spices. Other options include a flat rack that mounts under the upper cabinet and folds down when you need it, or a door rack on the front or back of the pantry door.
Cleaning Supplies
The kitchen often houses the cleaning supplies, particularly for apartment dwellers. But whether you live in an apartment or a house, you need to take a look at the supplies you

This undersink roll-out can organize the cleaning clutter typically
stored under the kitchen sink and can put an end to knocking over bottles
and cans to get to the supplies at the back of the cabinet.
This is done by making a step-like insert and stock before you deal with the issue of storing those supplies. Too often people run out and buy the latest fancy cleanser, which never gets used because nobody wants to cart a gazillion bottles and cans all over the house to do something as simple as clean. The cleansers get shoved into the far reaches of the kitchen cabinet under the sink where they are ultimately forgotten. So if you’ve got a lot of gourmet cleaning products that you never use, you might want to think about giving them to someone who wants to spend more of their time cleaning than you do. Stock the basics — cleaners that will do double, or even triple, duty for you. These can be stored in an under- sink pull-out storage rack, or on lazy Susans in the cabinet. Access is simple, and you’ll eliminate the knock-the-bottles-in-the-front- to-get-to-the-bottles-in-the-back problem. Basic cleaning supplies might also be stored in a cleaning caddy which can then be carried from room to room when cleaning. To child- proof the supplies, put them in a caddy or dish pan and store them on an upper cabinet shelf.
Brooms, mops, dustpans, and even buckets can be hung on wall space with clamps or hooks. Wall space in the pantry, broom closet, next to the refrigerator, or at the top of the cellar stairs can hold some, or all, of these items. Depending on the location, you might even be able to install a shelf on the same wall space to hold supplies, or you can hang an over-the-door rack to store your supplies. The rack can go on the back of or inside of, a door either in, or near, your kitchen.
However you store and organize your cleaning supplies, try to remember that the more supplies you have on hand, the more work it is to clean. In addition to the cleaning, you have to keep organizing and cleaning the cleaning supply storage area — a chore that the average clean person could live happily ever after without. Since it’s unrealistic to eliminate cleaning altogether, the next best thing is to cut back on the process and paraphernalia used for those chores. Not only will you save storage space, you’ll save time otherwise spent cleaning.
Super Tips -- Straight from the Pros
“The kitchen truly is the heart of the home,” Director of Product Planning at Merillat Industries, Inc. in Adrian, Michigan. Merillat is one of the world’s leading manufacturer of cabinetry for the kitchen, bath, and home, with distributors nationwide. Before Merillat introduces a new line of cabinetry, the Director analyzes and studies design, manufacturing, and retail trends in the industry so that each design Selected provides the homeowner with cabinetry that will add to the design as well as the function of their storage space in any area. She also works with cabinet accessories which he says can make a major contribution to an efficient kitchen. You can “customize” your new kitchen by installing cabinet interior and decorative accessories to maximize the storage capacity to suit your specific needs in the kitchen. These are some of the possibilities for accessorizing your cabinetry:
• Pantry Cabinet. Shelving, and swing-out units can be put to efficient use in the pantry, nearly doubling the storage capacity in this area. For example, a thirty-six-inch-wide pantry can provide up to thirty-two cubic feet of storage by utilizing shelf space, movable swing units, and interior door space.
• Revolving Shelves. These turning shelves can fit into any number of cabinet areas, providing easy visual access to the contents within. You can virtually insure that no space is left unturned or unused with these units which can fit snugly into a corner cabinet or other cabinets, providing fingertip access to kitchen storage space.
• Cutting Board. You can conveniently prepare vegetables and fruits on a cutting board which slides beneath the counter for storage when not in use.
• Knife Tray. A pull-out knife tray organizes and safely stores knives.
• Drawer Dividers. When you order the cabinetry, don’t forget to order some divided drawers to keep your silverware and cutlery organized.
• Appliance Garage. You can turn a corner or other countertop area into an appliance “garage” by installing a pull-down “door” to keep toasters, mixers, and other appliances out of sight.
• Microwave Oven Cabinets. You can free up countertop space by installing a special shelf above the counter to hold the microwave.
• Bread Box. A kitchen drawer can be turned into a bread box by installing this accessory, which is a bright metal box with a sliding top that helps keep bread and bakery goods fresh.
• Cookware Pull-Outs. Your pots and pans can be made more accessible if you install these shallow pull-outs in your lower cabinets. Instead of digging to get at the cookware in the back, you can simply pull all of the items into view for easy selection any time.
• Decorative Shelving. If you want to add an extra decorative touch to the kitchen, you can order shelves to match the cabinetry that can be mounted either on the wall or on cabinetry that is attached to the floor (such as the kitchen island extension). These small shelves can be used to display flowers, dinnerware, cookbooks or knickknacks, providing a personal touch to your kitchen.