If you plan to purchase a door slab, instead of a pre-hung door, or if you are adding a lock to a door, you will need the following steps on installing deadbolts and locksets. As shown here, there are many types, styles, and finishes available for door hardware.
Some are easier to install than others, and when selecting your new locksets, consider your level of expertise with this type of DIY work. If you require a lockset or special hardware that requires more skill to install, contact a professional for help.
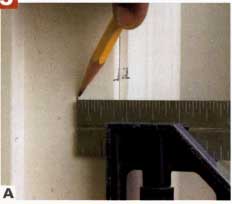
1. Layout the Position
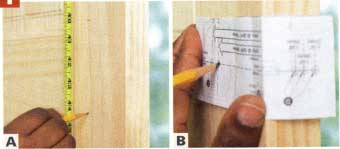
A. Measure and mark the location for the new lockset on the door slab
with a pencil and tape measure. B. Most manufacturers supply a template
to aid with lay out. Some are meant to be taped to the door, others
are used to make marks.
2. Drilling Holes for Lockset and Deadbolt
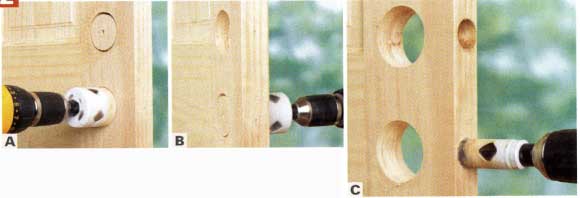
A. Using a hole-saw and a drill, make a hole for the lock and deadbolt
through the door slab. Do not go all of the way through. B. Turn the
door over and drill the hole from this side to complete the hole
for the lockset. Repeat for the deadbolt. C. The next step is creating
a hole for the latch bolt. Drill holes with a spade bit through the
side of the door, following the manufacturer’s template.
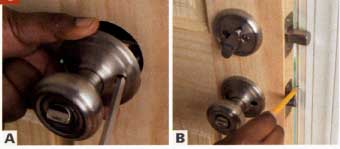
3. Installing the Deadbolt and Lockset
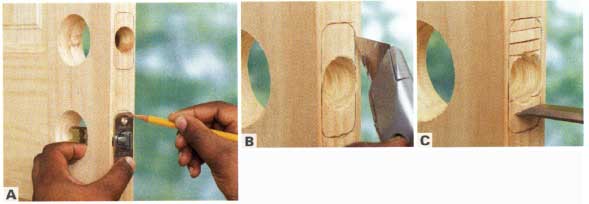
A. Insert the latch bolt inside the hole made above
in step 2-C. Trace around the strike plate on the door. B. Using a
utility knife, score the door along the outline. C. Strike a chisel
at intervals within the score lines to create cuts. This will make
it easier to remove the material.
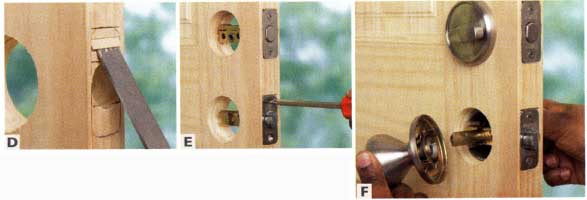
D. Using a chisel at less than 45 degrees, remove the material inside
the score mark, so that the strike plate can fit flush with the door.
E. Insert the latch bolt in the hole, making sure the strike plate
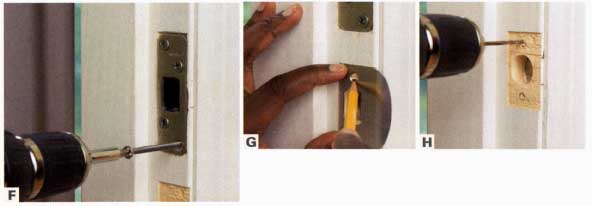
is flush. Attach the latch bolt assemblies with fasteners. F. Connect
the deadbolt face and the lockset handle to the latch assembly according
to the manufacturer’s instructions.
4. Finishing the Lockset
A. Finish assembling the lockset and deadbolt, using fasteners provided
or recommended. B. Line up the door with the door frame. Make a mark
where the top of the latch bolt hits the frame.
5. Laying Out the Strike Plate
A. Lay out the strike plates on the door jamb, making sure that the
marks are level and plumb, and that the lay-out marks will allow the
door to close within the frame. Refer to the manufacturer’s directions.

B. Drill the holes into the door frame for the latch bolts to fit. C.
Follow the directions on the previous page to cut a mortise for the
strike plate.
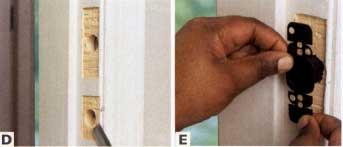
D. Use the template provided by the manufacturer to mark the holes
for the fasteners. E. Place the strike plate in the mortise cut.
F. Using the screws provided, attach the strike plate to the door
jamb. G. Using the lockset strike plate as a guide, mark the location
for the fasteners. H. Drill pilot holes at the marked locations for
the fasteners.
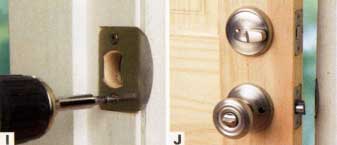
I. Place the strike plate inside the mortise cut on the door jamb.
Attach the strike plate. J. Test the locking mechanisms to make sure
the strike plates align.
Further Information
If your door does not latch well, slowly open and close the door, to see where the latch bolt lands on the door jamb. If the door latches well, the latch bolt will enter the strike plate. If not, check for the following:
- Hinge screws may be loose. Ensure all fasteners are tightened.
- The gap between the door and the jamb may be too wide for the latch bolt. You may be able to adjust this with shims. Off center latching can be fixed by shimming the door in the appropriate direction. If you are unable to fix misalignment with shims, you may need to reset the latch plates.
- The doors may be warped and causing misalignment. It is possible you will need to purchase and hang a new door.