Most people renovate their bathroom to upgrade old fixtures and , in the course
of remodeling, find they need to repair water damage. As discussed earlier,
excess moisture not only causes house materials to rot, but can also result
in serious health issues.
We’ll show you ways to control bathroom moisture
that will result in improved comfort, better air quality, and lower utility
bills. We will also discuss other important bathroom remodeling issues, including
low-impact construction and water- and electricity-saving strategies.
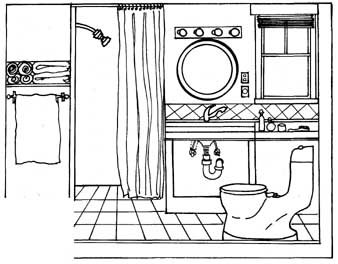
Green bathroom options, remodeled for efficient use of space
could include:
• high-performance, low-flow shower head with chlorine filter
• compact fluorescent bulbs
• lighting controls
• windows that open
• landscaping for shade
• greater natural daylight
• upgraded single pane windows
• water filters
• low-flow faucets
• insulated plumbing and pipes
• solvent-free adhesives
• low-flow or gray-water flushing toilet
Job Site and Landscaping
As you plan for your bathroom remodel, try to build with as little impact as possible. This means recycling job site waste and salvaging reusable materials. That avocado green sink may look hideous to you, but could be someone else’s treasure. In fact, maybe you want an avocado green sink that someone donated or could use the sink you are replacing in a second bathroom — be resourceful when looking for replacement bathroom features! Old lumber, door and window casings, and baseboards can all be reused when they are removed carefully. When reusing old materials is not possible, some companies can recycle them. For example, porcelain toilets and other ceramics can be recycled into concrete, and metal bathtubs can be used for making steel. Contact your local waste management authority for recycling information specific to your neighborhood.
Structural Framing
If you want to change the size or shape of your bathroom, this will probably entail taking down walls. Some walls you can demolish yourself, depending on the type of wall. Load-bearing walls — the walls that literally hold up the house — can be altered, but this requires new structural support in the form of a beam supported by posts on either side of the room. In addition, temporary wood frame walls will be needed to support the structure above until the new wall is in place. This work can be intensive, and is best completed by a professional. However, you can easily cut into or tear down non-bearing walls yourself without damaging the adjacent structures. You still need to be on the lookout for plumbing leaks — even if you have a professional work on the project, he could inadvertently break a pipe and cause a leak, or cut live electrical wires. Look for obstacles ahead of time to avoid unnecessary expenses and hardship.
Opening walls in your bathroom is a great opportunity to redo bad wiring or plumbing. You can also replace any rotted or damaged wood, repair leaks that have gone unnoticed, check to see if you have adequate insulation in the exterior walls, and caulk cracks in the structure so that air doesn’t leak through.
Plumbing
First, look at what kind of pipes you have. If your home was built before 1950, you may have lead pipes that should be replaced! Otherwise, cast iron, steel or plastic drainpipes are adequate, as are copper, brass, and steel. Polyvinyl chloride (PVC) pipes can also be used; although the PVC manufacturing process produces toxins, the pipes are durable and affordable, and won’t need to be replaced for a long time. Second, if you’ve opened up bathroom walls, consider moving the plumbing from outside walls to interior walls where heat from your home will keep the pipes warmer. Insulating the hot water pipes will further reduce heat loss through the piping.
To save water, add an “on-demand” hot water circulation pump that can send hot water to fixtures in seconds without wasting water while you wait for it to get hot. Some jurisdictions allow households to use greywater (all waste water except toilet water) for outdoor watering use or as toilet-flushing water. Although you need to be especially careful what you put down the drains, this will dramatically reduce water use around your home. If this is not currently allowed in your neighborhood or is too costly, you may consider “pre-plumbing” while the walls Radiant electrical panels are wonderful for when you’re sitting in the tub or while you’re drying off. They can be mounted on a wall or ceiling, and they heat you rather than the air. They can be put on a timer or controlled with a switch (see “Install Zoned, Hydronic, Radiant Heating” in Section 16).
If you are doing serious rewiring, put in a separate circuit for electrical devices. A hair dryer alone can use up most of a circuit’s capacity. Add extra “his and hers” plugs.
Insulation
As we mentioned briefly in the above framing section, renovating your bathroom is a great time to upgrade your insulation, because the walls are already open. The bathroom is where you want to stay the warmest. If possible, add new insulation in the form of rigid foam board on the inside of the framing. Insulating just to code doesn’t mean that it will keep you comfortable when you are wet in cold winter months; how much insulation you need also depends on your climate. Check the existing insulation to see how thick it is, and if it is evenly distributed so that heat does not escape through gaps. Also check for water damage or compaction, which can reduce the effectiveness of insulation. (Water damage can take the form of blackened wood — a sign of mold or rot — or obvious water marks.) When installing new insulation, fill the area around the tub: this helps keep drafts down and the tub warm. The most efficient, resourceful, and safe types of insulation include recycled-content fiberglass, and cellulose insulation. Make sure the insulation stays dry after it is installed; water vapor inside the wall can condense when it meets cool outer layers, causing rot and harmful mold growth. A vapor barrier installed on the warm side of the insulation can also prevent moisture from getting into the floor, ceiling, or walls.
Always use advanced infiltration reduction practices to further save energy in leak-prone areas. This includes using a low-toxic sealant around plumbing fixtures, such as the hole in the subfloor around the tub drain, and use rubber gaskets behind electrical outlets. The trap under the tub should be sealed well too, since the plumbing pipes go all the way down to the ground, and it is a typical place for drafts to occur.
FYI: Take precautions when removing paint from windows! According to the EPA painted window sashes and frames in homes built before 1978 may contain lead based paint. This is a special concern because the friction of opening and closing windows can release lead dust into the home.
Energy
Windows in bathrooms are important for many reasons. First, bathrooms without any windows at all are illegal in many jurisdictions because the windows provide necessary ventilation. Second, a large window can make the room brighter, resulting in proven mood-uplifting effects. Third, leaky windows can waste a lot of energy, therefore efficient double-paned windows with reflective or low emissivity film can effectively keep unwanted heat or cold outside your bathroom. Try not to put the window directly over the bath or in the shower area. This can cause condensation problems when the steam hits the cool window surface. Vinyl or fiberglass window frames will also minimize the potential for condensation damage, and are a better option than wood or aluminum. Other options include well-insulated skylights or a smaller, more efficient solar tube that effectively brings light in through a reflective pipe.
Heating, Ventilation, and Air Conditioning (HVAC)
Fixing up an existing bathroom generally does not require changing air registers, radiators, or baseboard heaters — usually it can simply be “retuned” by a heating contractor. A new bathroom, however, will require an extra heat register or radiator installed by a professional, usually with no extra strain on the heating system. Make sure the workers use duct mastic on duct joints rather than less- effective duct tape. The new ductwork should be installed in conditioned (or insulated) walls rather than in walls facing the outside of your home, where energy can more easily escape from the pipes.
Ventilation requirements are usually stipulated in the building code for each jurisdiction. Often the code will state that you need to have either an operable window or a fan to get rid of unwanted moisture caused by showering and bathing. We recommend that a fan be installed in any case — you don’t want to open a window in the winter! The fan should be energy-efficient and should be vented to the outside. Most people prefer quiet fans under two “sones” when they are quiet they tend to get used more often. If extensive HVAC work is being considered, keep in mind that a heat recovery ventilator (HRV) can transfer heat from outgoing bathroom exhaust air to warm the incoming fresh air for the entire house.
Water Heating
If the current water heater is old or if you’ll be using a lot more water because of a new whirlpool bath, you’ll need an upgrade, such as a more efficient water heater with an energy factor (EF) of .6o or higher. Tankless water heaters are a more expensive option, but they save water, energy, and petroleum resources by heating water as it is needed. Installing a heat trap will help minimize water heat loss by preventing thermo-siphoning. (See “Upgrading Your Water Heater” in Section 17.) If you decide to keep your existing water heater, consider an insulating jacket that works like a winter coat to keep heat in. It costs only about $10 to $20 and reduces heat lost through the tank by 25 to 40 percent.’
Interior Materials/Finishes
Bathroom finishes should be attractive, water-resistant, and healthy. Some people use wallpaper, but we do not recommend this option because moisture can get behind the paper (especially vinyl wallpaper), and cause mold growth. Also, avoid using particleboard and medium-density fiberboard (MDF) in cabinets and substrates under counter tops. Choose exterior-grade plywood or a formaldehyde- free alternative (see “Formaldehyde” in Section 5). If you do use particleboard or MDF, use a low-toxic sealant, such as water-based, low-VOC paint to keep the unwanted vapors trapped in the material.
Solid wood can be a healthy alternative. The best woods to use are Forest Stewardship Council (FSC)-certified with a low-VOC, water-based wood finish. Sustainably harvested FSC wood is also available for trim material. If you decide to paint the finish, use a hard wearing, washable, low- or no-VOC and formaldehyde-free paint that minimizes indoor air pollution.
Ceramic tiles are a popular finish because they are water-resistant, washable, and don’t need a painted finish. Look for a low-toxic grout to fill the areas between the tiles. Natural stone, like marble or slate, is a more expensive option, but is extremely water-resistant and is a healthy, beautiful element to add around showers, tubs, or other areas of the room. Like ceramic tile, stone is a durable material that will save resources and energy because it will rarely need replacing. For all bathroom materials, select low-VOC adhesives and sealers when they are required to minimize toxins in your indoor environment.
Flooring, like other bathroom finishes, should be durable, water-resistant, and washable. We do not recommend carpeting — it traps dirt and moisture that leads to unhealthy mold growth. Use small, washable rugs for softer surfaces in specific areas of the bathroom. The best flooring options are hard or smooth surfaces, recycled-content ceramic tile, and natural linoleum. Ceramic floor tiles, larger and thicker than walls tiles, are easily cleaned and long-lived. Some floor tiles are made from stone. Dense or vitreous tiles are the most moisture- resistant. Tiles should be installed with low-toxic grout and adhesive when possible.
Natural linoleum is the preferred alternative to vinyl. Although similar in appearance to vinyl, natural linoleum is made from natural materials including linseed oil, jute, and wood dust. It is durable, available in a variety of patterns and colors, and can be installed without toxic adhesives.
FYI: Volatile Organic Compounds (VOCs): VOCs are a class of chemical compounds that can cause nausea, tremors, headaches, and , some doctors believe, longer-lasting harm. VOCs can be emitted by oil-based paints, solvent-based finishes, and other products on or in construction materials.
Bathroom Checklist Job Site and Landscaping (see Section 7)
Structural Framing (See Section 9)
Plumbing (See Section 12)
Electrical (See Section 13)
Insulation (See Section 14)
Solar Energy (See Section 15)
Heating, Ventilation, and Air Conditioning (HVAC) (See Section 16)
Water Heating (See Section 17)
Interior Materials/Finishes (See Section 19)
|
Next: Green Renovation and Remodeling: The Kitchen