|
CHOOSING A SEWING MACHINE Quite the most exciting development for home dressmakers in the last decade
has been the fantastic change in sewing machines available on the market.
Anyone who has used only a straight-stitch machine, and is lucky enough to
be planning to buy a new sewing machine, has some very pleasant surprises
ahead. If you are considering such a purchase you should take several weeks, or
even months, in careful study of the market, before making a decision. Until
a number of the latest makes of machine have been demonstrated to you, it
will be impossible for you to imagine how useful or versatile a good modern
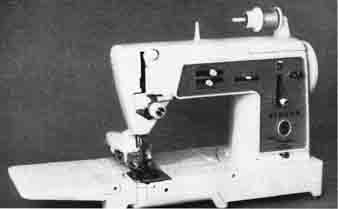
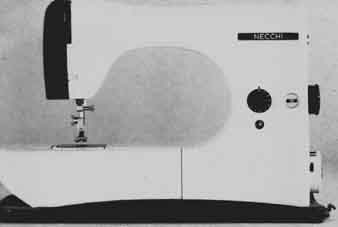
zigzag or automatic machine can be. What are the main types of sewing machine available? They can be roughly divided into straight-stitch, zigzag (otherwise known as swing-needle) and automatic machines. Some of the manufacturers like to break the classifications down still further, and categorize their machines as straight-stitch, zigzag, semi-automatic, automatic and fully-automatic. For simplicity, however, we will just deal with the three main categories. STRAIGHT-STITCH MACHINE If you are sure you will only use the machine for plain sewing, you may find that the straight- stitch machine meets your needs satisfactorily. It may come with various attachments. Before you decide, however, be sure to try at least one or two swing-needle machines in a similar price range. It may be that for about the same cost, or perhaps only a little more, you could have the extra versatility of swing—needle sewing, without any sacrifice in the quality of the machine itself. Straight-stitch machines will normally sew backwards as well as forwards, and they can sometimes be released for free—motion darning, using a special darning foot and a hoop attachment. 
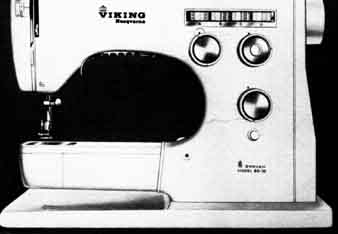
If you already have a straight-stitch machine, you can probably buy various extra attachments by the same maker. In addition, you can buy a buttonholer device (62), which will attach to most straight—stitch electric machines and en able you to produce reasonably satisfactory machine-made buttonholes. It must, however, be said that although this method is usually successful with most light fabrics, some of the heavier fabrics may prove more difficult: in which case a bound buttonhole would probably be best. ZIGZAG OR SWING-NEEDLE MACHINE These are much more versatile, even in their very simplest form. By moving a lever or a dial knob, you can stitch not only in a straight line but also from side to side. This means that you can produce a zigzag stitch, which widens your scope considerably. The simplest zigzag machines will of course give a limited choice of stitches, but many medium-price to higher-price zigzag machines have a surprisingly wide range: not only satin stitch, but also blind hemming and over-sewing, shell edging, making buttonholes; sewing on buttons, hooks and eyes and press fasteners; finishing off seams and raw edges; and , with some types of machine, making whipped hems on such items as sheets and pillowcases. You may be able to produce simple decorative patterns (a small to fairly comprehensive range, depending on the model); work with twin needles, or stab needles (to produce very delicate ‘holed’ stitches on fine fabrics like organdie), and tackle fancy appliqué work. Some of the more expensive zigzag machines, for example the Viking Husqvarna from Sweden, will enable you to make a stitch called ‘three-step zigzag’, which is valuable for finishing edges where a fabric frays very easily. Bernina machines, made in Switzerland, offer a ‘five-step serpentine stitch’ which is also very satisfactory. A warning, however, about sewing machines in the cheaper price ranges: a skilled operator can make any machine perform far more adequately than someone who is new to the task. A great many people buy the very first sewing machine they see demonstrated. If you have never watched a modem sewing machine at work before, it's very easy to be impressed by its versatility when you see it demonstrated in the shop, only to be disappointed once you have made the purchase and find that it will not perform anything like as easily as you had imagined. This applies particularly to zigzag machines. Let me give you an example of how misleading a demonstration can be. I was talking to a friend who had bought an average-priced zigzag machine. Before the sale the demonstrator had shown her a variety of decorative patterns. She was impressed, and agreed to buy the model shown. She was also told she would be given instruction on its use, and because she was a fairly experienced needlewoman, she felt confident that all would go well. However she soon found that even with tuition it was not nearly so easy to produce patterns and embroidery as she had imagined it would be. In fact it took a good deal of skill to manipulate the controls to make a pattern. For example, she had thought that she would be able to produce tiny leaf-shapes automatically—but not at all. The differing widths of satin stitch which filled in the shapes were achieved by manipulating the stitch-width control by hand—a trick which she found very hard to master. Her disappointment increased when she discovered that while her machine would stitch only from a central point to one side (with what is called a two-position or left-hand-position needle) another machine by the same manufacturer and costing only about 10 ($25) more, had a three—position needle—in other words it would sew from the centre point to the right and the left. This meant that she could have completed patterns, including her leaf-shapes, in one movement, whereas with her own machine she had to stitch one half of the pattern and then turn the fabric to stitch the other side. This may seem a trivial matter. However it applies not just to one leaf-shape but to the whole range of sewing techniques. Most sales staff of course, are fully aware of what they are selling, but they may not want to jeopardize a sale by explaining the difference in cost between a two-position and a three-position needle machine. If they are untrained they may not even understand the difference themselves. However if you later decide to trade your machine in for a better one, you will probably find the resale value of a two-position needle machine very much lower than that of a three position needle machine. Generally speaking, the higher the price of machine, the greater the versatility. However this isn't always the case: one maker’s plain zigzag model may be much the same price as another maker’s semi-automatic of equivalent quality. == Wiki Sewing ==
Seams are the foundation of sewing. A seam holds two pieces of fabric together and should be strong and depend able. In this section, you'll learn all of the steps required to make sewing seams and seam finishes trouble-free.
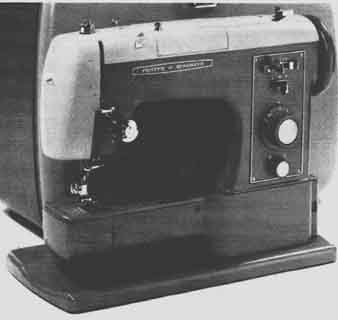
Seam Guides Most sewing machines have built-in seam guides, and some machines have an additional seam guide that can be used to prevent you from sewing beyond a set limit. In addition to sewing-related seam guides, you can use simple items from an office supply store. The presser foot and throat plate markings offer the most commonly used seam guides; these are etched into the throat plate. Attachable seam guides, as shown, offer a barrier to prevent the seam allowance from going beyond the desired guide. Masking tape, magnetic seam guides, and even a pad of sticky notes can be placed on the sewing machine bed as a seam guide. Note: You can use the corner of a pad of sticky notes as a seam guide to turn corners and sew circles. Test a Seam Guide Testing a seam guide ensures that you'll be sewing the seam allowance that you want and offers you endless possibilities for setting up unusual seam guides. 1 Place a tape measure horizontally under the sewing machine needle, and insert the needle into the tape measure at your desired seam allowance measurement. 2 Place your desired seam guide at the end of the tape measure or verify that the machine markings are correct. 3 Turn the tape measure vertically to set a seam guide for turning a corner. TIP-- Best Way to Alter: Changing the seam allowance that's listed on a pattern can alter the way the finished item fits. Making a garment longer by using smaller seam allowances on all horizontal seams may seem like a solution, but you'll be changing where the bust line, waistline, and hip line land on the garment. Use adjustment lines marked on the pattern before you cut out the pattern instead. Sewing a Seam When you sew a seam, straight or curved, the seam allowance needs to be even and consistent for the length of the seam. Keeping your stitches straight is the key to having a smooth seam on the outside of the garment. 1 Set your seam guide. Align the fabric under the presser foot so that the seam allowance is butted to the seam guide and a few stitches' worth of fabric are behind the needle. 2 Reverse stitch to the front end of the fabric, stopping so that the last stitch is at the end of the fabric. TIP--Watch the Guide: Always watch the guide and not the needle. Watching the needle is the most common reason for wandering stitches. 3 Sew forward, keeping the edge of the seam allowance at the seam guide. Sew slowly until you gain full control of your sewing machine's speed. 4 To end the seam, sew to the end of the fabric and then reverse-stitch three or four stitches before raising the presser foot and removing the fabric. TIP: Crooked Stitching: Crooked stitching should be removed. You can remove the faulty stitching without removing the entire seam. Sew a few stitches on top of the correct stitching at each end to lock the replacement and existing stitches. Press a Seam Pressing during garment construction is the difference between a professional-looking result and one that looks somewhat amateur. Pressing involves moving the iron up and down instead of pushing back and forth across the fabric, which can distort the fibers. 1 The first step to pressing while you are sewing is to press as it was sewn. In the case of a seam, press the fabric exactly as it was sewn when the fabric was under the presser foot. This sets the stitches in the fabric. 2 To create a pressed open seam, open the fabric and press the seam open with the tip of the iron. 3 Press again from the right side of the fabric. Repeat until the fabric and seam lie smoothly. TIP--Pressing Curves: A pressing ham is a great tool to use to press curves. You can also use towels rolled and folded to get the shape you need to support a curved seam. Curved Seams The only variation to sewing a curved seam is that the seam allowance curves to follow the edge of the fabric. As with any seam, the seam allowance must stay consistent. A continuous curved seam or circle doesn't need to be back stitched. When the sewing comes to the first stitches, sew over the first three or four stitches to secure the stitching in the fabric. A curved seam usually requires clipping or notching for the seam to lie smoothly. It is important to not weaken the seam when you clip or notch the seam. Clip only in the seam allowance, leaving the seam line intact to preserve the seam's integrity. Clean Finished Seam Finished seams will help fabric that's prone to fraying remain strong and stable. Use scraps of your fabric to experiment with the type of seam finish that will work best with your fabric. Tightly woven fabric that's not prone to fraying but could fray after laundering can be finished by using pinking shears on the edge of the seam allowance. Combining straight stitching just inside the pinked edge offers one more step to reinforcing a seam allowance. If it won't create bulk that will show though to the outside of the fabric, a seam allowance can also be finished by pressing under 1/8 inch of the seam allowance and stitching the turned edge with a straight stitch. FAQ: How do I finish a crotch seam that's trimmed down? Crotch seams are commonly sewn with the seam and a second row of stitching just inside the seam line and then trimmed. A zigzag stitch may also be sewn on the edge to prevent fraying. Zigzag Seam Finish A zigzag seam finish is one of the easiest and fastest seam finishes you can sew with a sewing machine. 1 Sew and press the seam as instructed in your pattern. 2 With the seam pressed open, move all the fabric, except the seam allowance you'll be sewing, out of the way. 3 Set your sewing machine for a zigzag stitch that's wide enough to enclose approximately one-quarter of the seam allowance. 4 Place the seam allowance only under the presser foot so that the right swing of the needle encloses the edge of the seam allowance. Find a guide on the presser foot to align the edge of the seam allowance. FAQ: How can I keep a zigzagged seam finish from being so bulky? Elongate the stitch length so that the stitching is spread out. It will enclose the seam allowance, but the stitching will not be dense enough to create bulk. Lace Inset Seam Lace and other decorative details are often set into a seam line. Lace is available in many weights and densities. Your choice should be matched to the weight of your fabric or lighter to prevent heavy lace from adding excessive bulk to the seam. GATHERED LACE 1 Gathered lace can be added to straight or curved seams. Position the lace on the fabric so the gathered edge or edge you want enclosed is toward the seam allowance. 2 Baste the edge in place so the edge of the lace will be in the seam allowance when you sew the seam. 3 Finish the seam as desired. STRAIGHT LACE 1 Straight lace can only be added to straight seams. Sandwich the lace between the fabrics and sew the seam. 2 Finish the seam as desired. Add Piping to a Seam Adding cording or piping to a seam is common in home décor and garments. Piping is bulkier than fabric, so you need to use a zipper foot or cording foot on your sewing machine. 1 Using a zipper foot or cording foot, sew the piping to the right side of one layer of the fabric with the stitching at the seam line. 2 Enclose the piping by placing a second layer of fabric over the fabric with the piping-right sides together. 3 Stitch the two pieces of fabric, with the piping sandwiched between, on the original stitch line. Keep the stitching tight to the piping. Note: Clip and notch corners to allow the piping to lie smoothly. Sewing Corners Markings (or dots) and seam guides will help you to determine when to stop sewing and pre pare to turn a corner. To sew a corner: Stop with the sewing machine needle down, raise the presser foot, turn the fabric to the seam guide, and lower the presser foot to continue sewing. SEW AN OUTSIDECORNER WITH SEAM INSETS Turning corners with lace, piping, or trims will require extra attention so that the inset item will turn with the angle you're sewing. 1 Sew on the trim, stopping with the needle down at the corner of the seam line. 2 Raise the presser foot and clip the seam allowance of the trim close to the stitch line. 3 Rotate the fabric and trim to line up the next side you will be sewing. 4 Lower the presser foot and continue sewing. SEW AN INSIDE CORNER WITH SEAM INSETS An inside corner can cause trim to turn back on itself, creating extra bulk and the possibility of sewing over the trim's seam allowance. Here is a solution: 1 Sew on the trim, stopping with the needle down at the corner. 2 Raise the presser foot and cut a V in the trim seam allowance. 3 Pivot the fabric and trim to set up sewing the next edge closing in the V notch. 4 Lower the presser foot and continue sewing. FAQ--How do I eliminate the bulkiness at the corners of my pillows? Try trimming each corner to eliminate the bulk. Another trick is to "square off" the corner, by turning the corner halfway and sewing two to three diagonal stitches, and then turning again to finish the rest of the corner. Easing Many seams require a rounded edge to be joined to a straight edge of fabric, such as a sleeve on a jacket. At first it looks as though there is no way the two edges can possibly fit together. Easing in the rounded edge, without creating any tucks or gathers, is possible when you know how to ease in the fabric. 1. Sew two or three lines of machine basting stitches on the rounded piece of fabric in the seam allowance, close to the seam line, leaving a thread tail at the end of your stitching. 2. Pin the round-edged fabric to the straight edged fabric, matching any pattern markings. 3. Pull the ends of the basting thread to bring the fibers of the fabric closer to each other and to fit the rounded edge to the straight edge of the fabric. Pin in place and be sure the seam line of the rounded-edge fabric is smooth, and the fullness is evenly distributed, before machine sewing it in place. TIP---Machine Basting Next to a Seam Line: Changing needle position is a great way to control where your lines of machine basting will be sewn. Set your fabric to a seam guide for the seam allowance of the finished seam, and change the needle position one to three positions to the right of the seam line. Gathers Gathers, commonly used in home décor and garment sewing, should not have any tucks or folds. For a professional appearance, evenly distribute the gathers. 1 Sew two or three lines of machine basting stitches on the seam allowance just inside the seam line of the fabric that will be gathered. You'll need to leave a thread tail at the end of the basting stitches. 2 Pin the fabric that will be gathered to the flat fabric, matching any pattern markings. 3 Pull the threads at the end of the basting to gather the fabric. Evenly distribute the fullness and stitch the seam. TIP--Gathering Heavy Fabric: Heavy fabric can be difficult to gather with basting threads. Zigzag over a piece of string, on the seam allowance, without stitching on the string. To gather the fabric, pull the string while being careful not to pull the other end of the string through. AUTOMATIC MACHINE This does everything that a zigzag machine can do, and more besides, including a wide range of automatic embroidery stitches. Some fully-automatic machines can produce special stitches that stretch with the fabric—an important feature for anyone who plans to sew with stretch fabrics, like those used for stretch slacks and swimwear. Some machines, for example, offer an Overlock Stitch (used to make the seams and bind the seam allowance in one operation) and Triple Lock Stretch Stitch, and for these stitches the fabric is automatically moved forwards, then backwards while the needle stitches from side to side. This is a miraculous sight to anyone not used to fully- automatic machines, especially when the machine is switched to slow speed so that you can see the full complexity of the action. With other automatic machines the needle may move from side to side, but the fabric will only feed in one direction (unless of course you decide to reverse it manually). Even among fully-automatic machines—the aristocrats of sewing machines—there is a surprising difference between makes. It isn't so much a question of what they will do, but of how the various effects are achieved. Some models reach the end results without requiring more than the turning of a knob or two, or the setting of a lever, or perhaps the addition of a small plastic stitch selector called a cam. With others it may be necessary to set a number of levers and knobs, or to slide dials to certain settings, or to coordinate levers and dials with discs or cams. Remember that one sewing machine isn't necessarily better than another one because it's complicated. A large number of knobs, levers and push-buttons don't always mean more versatility. Some of the most advanced sewing machines on the market are deliberately designed to have as few moving parts and controls as possible; and one of the most sophisticated models available, with which practically every conceivable sewing variation is possible, has only two more knobs than a straight-stitch machine. If you have a very unmechanical turn of mind you may be positively daunted by the presence of a vast number of knobs and switches and levers which all have to be coordinated; and if a machine is elaborate in its controls, you may at first need to consult the instruction book constantly for even the simplest stitch, which can be irritating. One machine I tested, the top-price model in its range, fell down badly on the instruction book. It took two hours to work out how to sew ordinary straight—stitch, because it was necessary to wade through pages of irrelevant and disorderly information, including directions on how to use a treadle machine! Ask to see the instruction book before you agree to buy the machine. Some instruction books, for instance, are written by experts who know their machines too well, and can no longer look at the subject through the eyes of the beginner. Flat-bed or free-arm? A flat-bed machine is the type which most people are used to. It has a flat working surface for the material; and if one is setting in a sleeve, or doing something else fairly intricate, one normally learns to maneuver the work to avoid catching other parts of the article in the stitching. With a free—arm machine, however, there is no such problem because the working surface consists of a narrow rounded arm with space below it, so that you can slip sleeves or socks, trouser legs or loose—cover sections over the free-arm for sewing or darning. If you need a larger working surface, you simply clip on the ex tension table which is provided; and this converts the machine into a flat—bed type. Many people consider that a free-arm machine has very distinct advantages especially as it can always be converted back to a flat-bed type. A flat-bed model, of course, can't be turned into a free-arm machine. The choice isn't so much a question of price as of make. You can get a relatively inexpensive plain zigzag machine which has the free arm. Many of the top-price automatics also have the free-arm, but some do still retain the flat—bed styling. Sewing machine attachments As sewing machines have become more automatic, the importance of separate attachments has become less pronounced. Straight-stitch machines in the average to higher price range usually have special attachments for carrying out a variety of specialized sewing jobs, and anyone who has bought a straight-stitch machine in fairly recent years may have purchased at the same time one or a number of attachments, such as a multi—slotted binder, foot hemmer, zipper-foot, gathering foot, edge stitcher, tucker, flange hemmer, quilter, gauge-presser foot and buttonholer. Many of the attachments popularly sold with sewing machines looked so complicated that people were discouraged from using them, and the belief grew up that it was sense less to buy a higher-priced sewing machine, because one would never use the complex gadgets. This kind of thinking need no longer apply with modern machines, however. The fully- automatic, and to a lesser degree the semi automatic and plain zigzag machines, can do many of the specialized jobs without any attachments. Some are still necessary of course—for example the quilter is a valuable asset with any type of sewing machine—but their fitting has been made easier by the use of a snap—on, snap— off presser foot. This trend away from attachments seems likely to continue. What is happening in effect is that sewing machines are becoming at the same time far more complex and sophisticated in the number of operations they can perform and yet simpler to understand and operate. Features that make sense Here are a few of the available features, taken from among the leading makes of fully-automatic sewing machines, that seem to me to make very good sense: * Special low-gear speed for complicated work, blind hemming, and fabrics such as PVC vinyl and leather. It is also highly valuable for anyone who isn't familiar with electric sewing machines, and especially for use in schoolrooms and domestic science colleges, where students can sew at a comfortable speed until they gain confidence and skill. A point worth making here is that low speed may be achieved in one of two ways. In a machine which incorporates a low-gear speed, the motor itself is actually slowed down because you ‘change gear’, and the power is increased, just as when a car changes gear. With other types of machine the process is equally simple, but the motor may continue to run at the same speed while the electricity supply is reduced. * Simplified threading system. Most modern machines have less upper threading points than they used to have. Some, like the Bernina, don't need threading at all: the thread is simply slipped over a number of points. * Simplified stitch selection. Where stitch selection can be simplified the whole machine benefits. One machine, the Viking Husqvarna, has a color-coding system, where knobs with different color markings show at a glance which stitch you are choosing (this means you don't have to consult a code number in a chart). Some machines use lever settings, some involve the user slipping on cams or discs. * Automatic buttonholer which completes a buttonhole without your having to turn the fabric. This is especially valuable with fairly bulky garments, when turning the work can be exceedingly difficult. With some machines there is a special dial with five digits which you turn for each of the five stages of a buttonhole. One machine, the Pfaff, allows you to cut the button hole without removing the fabric from the machine. * Non-jamming bobbin. Modern machines seldom jam in normal home use although I tested one top—price machine, straight from the factory, which jammed irrevocably the second time I used it and needed a new bobbin case. Some manufacturers have bobbins which they guarantee will never jam, because of the basic design. This is a very important feature for schools or colleges, where machines are more likely to be misused. * Pull-down light, which gives bright direct light for working on dark fabrics. Making your choice Only you can know what your ideal machine would incorporate, and you will only learn this by looking around at what is available. So as I said before, don't buy the first machine you see demonstrated. Visit dealers in your area and ask for a demonstration (or visit an exhibition where demonstrations are going on all the time); consult consumer reports and give intelligent but not slavish consideration to their findings. Ask friends and neighbors who have recently purchased a sewing machine for their views on it. As you narrow the choice down, see whether the demonstrator is willing to let you try the machine yourself, under supervision. Before you make a final decision run through the following check list: 1. If you plan to buy a simple straight-stitch or plain zigzag machine, are you sure that you will not later regret being without some of the refinements which you could obtain by paying a little more? On the other hand, if you plan to buy a top-of-the-scale fully-automatic machine, are you sure that it's not too elaborate for your requirements, too complicated for you to cope with happily? 2. Do you find difficulty in threading the machine, or understanding how to set the tension? 3. Is the machine so complicated that you have to consult the instruction manual constantly? Is the instruction book adequate, taking you from the first stages of threading up the machine and making simple straight stitches through in logical order to more complicated stitches? 4. Are you sure that you know the difference between a flat-bed and a free-arm machine, and that the model in which you are interested offers what you require? 5. How will you store the machine? If there is a carrying case, is it strong and pleasing in design? If you plan to buy a machine table, is there one in a style which would fit in with your taste in home furnishings? 6. Is the manufacturer a reputable firm of sound standing? 7. Check that servicing, if necessary, will be prompt and adequate. Ask what period of time the guarantee covers. Sewing machines don't often go wrong, but they can. There is a surprising variation in guarantee periods between manufacturers, and guarantees may cover, say, one year or two, three, five, ten, or even twenty- five years. One manufacturer agrees to replace faulty parts free ‘at anytime’. Motors are usually covered by guarantee for a shorter time than the main guarantee—normally for two years. Dealers’ service—the period when you can expect to go back to the shop to ask for service without incurring labor charges—may vary between six months and five years or more, depending on the dealer. USING YOUR NEW SEWING MACHINE Having made your purchase, be sure you will get value for your money by taking instruction on the use of the machine. Sewing machine dealers usually offer buyers a good after-sales service, either sending a representative to the customer’s home to demonstrate the use of the machine, or inviting the customer to come along to the shop premises for tuition. Some manufacturers may offer one lesson, others two or more, and one manufacturer I spoke to said that if the customer was having difficulties, which was unusual because in this case the automatic machine was a particularly simple one, she could come back to the London show rooms whenever she wished and a demonstrator would gladly give her advice. As with all modern equipment, it's absolutely essential to read the instruction book carefully, not once but many times. If small troubles do develop they are usually caused through misuse of the machine. So get to know your machine thoroughly, work in exactly the way the demonstrator and instruction book advise, and enjoy your sewing. A good start with a good sewing machine can bring a lifetime of pleasure. Sew a fine seam The following notes are directed to those who are not experienced in the use of a sewing machine. If you are a skilled machinist, skip the next few pages — they will seem like a primer. Before you begin to sew a garment: 1. Practice sewing straight. If you have never used a sewing machine before, it's a very good idea to start by sewing practice lines, angles and curves. One sewing machine manufacturer, Viking Husqvarna, produces practice sheets (domestic science teachers and college lecturers can make block app1ication for classroom use) and they have given me their permission to reproduce two of them here (63 and 64). 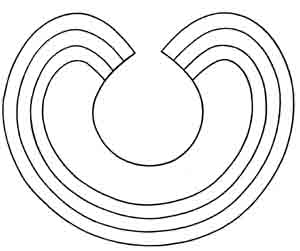
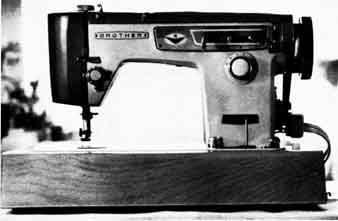
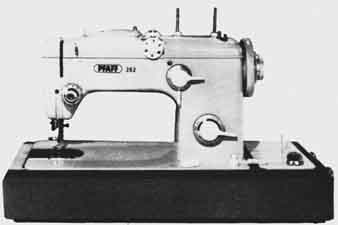
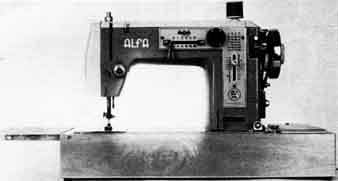
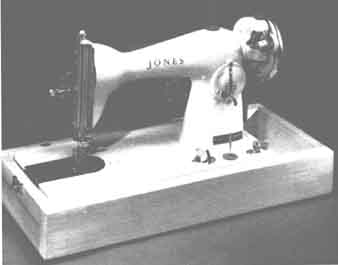
To make up your own practice sheets for home or classroom use: (a) Trace the designs on to squares of tracing paper. Be very careful to copy the lines accurately, using a good ruler for the straight lines. (b) Starting with the first design, sew along the lines keeping as accurate as possible. Do not watch the needle but keep your eyes on the sewing line. If you wish you may sew without thread on these practice squares, though it's perhaps more encouraging if you do use thread. Repeat with the other practice square. 2. Make a fabric test piece. After cutting out the garment or article you are making, always use some of the scraps left over as test pieces. 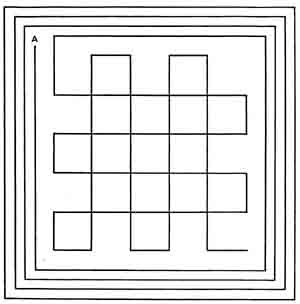 A Look Back ... What was Modern in the Late 1960s...
Cut a left-over scrap into a rectangle, fold it double, and then machine—stitch in a series of straight lines to assess the treatment it needs. Always work with two layers of material. Check the following: (a) Stitch length—is it suitable for the fabric? As a general rule shorter stitches are needed for finer fabrics, longer ones for thicker, firmer fabrics. If there is any tendency to puckering, the stitch length may be too long. Consult the machine instruction book for guidance on stitch length. (b) Tension—is it even? The threads should lock at the point where they pass through the fabric, and there should be no pulling either on top or underneath (see 65, 66 and 67). Refer to the instruction book for guidance on adjusting tension. Normally only the top-thread tension will need correcting. Adjusting of the bobbin thread is best left to an expert. (c) Needle—is it suitable for the fabric? Is it sufficiently sharp or is a new needle necessary? A modern sewing machine should have its needle changed to suit the fabric. One should not follow the long-established practice, or perhaps I should say malpractice, of always using the same needle year in, year out. Changing a needle is simplicity itself on a modern machine. (d) Pressure—is it correct for the fabric? Extremely fine or very thick fabrics may call for a change in pressure. Consult your instruction book on this point. 3. Keep to the seam line. Most patterns which you buy in this country provide for a 4-in. seam allowance on most turnings (exceptions are hems and cuffs). Your sewing machine may have guide lines marked on the throat plate to help you to stitch straight and at an even distance from the fabric edge. If it doesn't , you can buy a special seam—line attachment, or use colored adhesive tape to mark a line 4 in. from the needle point (be sure that you get the tape straight!). If your sewing machine has guide lines but they are only in centimeters, you have two alternatives. One is to get used to thinking of seam allowances in centimeters (most printed paper patterns give the centimeter measurement in brackets). The other is to fix a strip of colored adhesive tape as already described.
4. Beginning to stitch. (a) Set the needle on the seam line exactly, turning the balance wheel by hand to pierce the fabric. If the machine has a reverse action, it's a good idea to begin sewing about 4 in. from the end of the fabric, stitch backwards to within in. of the end of the fabric, then stitch forwards again over the same line. When you begin to stitch forwards again, it's good practice to hold the ends of the threads behind the presser foot, to ensure that they are not entangled in the stitching or pulled down the needle hole. (b) Stitch gently at first, increasing the speed gradually; you can use the special slow speed if one is available on your machine. Keep your eye on the presser foot and follow an edge or seamline—do not watch the needle. (c) Let the fabric feed through at its own pace— don't pull it through. The only exception to this is when you are sewing very bulky seams, when the pressure can be slackened (consult the instruction book on the way to do this) and the work carefully fed forwards. 5. While you are stitching. If you wish to turn a corner, or to rearrange the work, be sure that the needle is down in the fabric before you raise the presser foot. 6. When you reach the end of the work. Most sewing machines have a thread cutter behind the presser foot. Stitch to the end of the fabric, lift the take-up lever and draw the work backwards away from the presser foot. Cut the threads to leave about 6 in. of thread on the end of the seam for tying, and about 6 in. projecting from the needle eye and needle hole (so that when you begin sewing again there will be no hold ups because of the needle becoming unthreaded or the bobbin thread not operating). Most machines will sew in reverse so that you can reverse back over the stitches at the end of a seam, to avoid the need for fastening off thread by knotting. Whichever method you use for finishing ends of seams you should be sure to snip off loose ends before going on to the next piece of sewing. Get into the habit of doing it and it will never seem an irksome task. Leaving all the ends hanging until the garment is almost finished is lazy dressmaking practice. The ‘difficult’ fabrics There are some materials which present certain difficulties to the home dressmaker, but usually they are easy enough to sew with a modern sewing machine if you go about it the right way. Here are a few hints which may help you: LEATHER Obviously you will not use a fine needle for leather, but make sure it's not too thick either, or the needle may tear the leather. Use long stitches. Very thick leather may need a special cutting needle which has a small knife in the point, but most normal thicknesses of leather and suede, and most imitation leather, don't need this special needle. FOAM-BACK FABRICS These may prove difficult to sew unless your machine offers a special roller presser foot which is designed to allow the fabric to glide through. It is also possible to buy a silicone spray for treating the surface over which the fabric will slide. Both these help to prevent the foam plastic from clinging to the presser foot and feed plate. PVC (VINYL FABRIC) Use large stitches. Some home dressmakers advocate the use of a fine smear of oil or vase- line on the bed (or sewing surface) of the machine to help the fabric to slide through easily; others recommend the use of talcum powder sprinkled around the sewing area. Curves are difficult to sew on PVC unless they are very gradual, and shaping, too, should be avoided as far as possible. STRETCH FABRICS As indicated elsewhere, stretch fabrics present few problems if you have a zigzag machine, and even fewer if you have a fully-automatic machine which allows you to use special ‘stretch stitches’ which will stitch and overcast seams simultaneously. A synthetic sewing thread should normally be used. OTHER SYNTHETIC MATERIALS Use a fine needle and fine sewing thread. Most experts recommend the use of synthetic sewing thread. Loosen the thread tension slightly. Use a long stitch. More about fabrics and fibers, together with sewing notes, can be found in Section 6. DECORATIVE WORK WITH A SEWING MACHINE Hand embroidery is an art form which goes back thousands of years, and countless generations of women have taken pleasure in creating embroidered articles. However, since sewing machines have become more sophisticated, machine embroidery has become for many people a hobby every bit as satisfying as hand embroidery, with an almost limitless range of effects possible. There are basically three ways of making designs with a sewing machine: (a) By the use of ‘free-hand’ embroidery. (b) By the use of the zigzag stitch in appliqué work. (c) By the use of the patterns produced automatically by the sewing machine. Free-hand embroidery Once you have learned the knack, free-hand embroidery is possible with most machines— even the older, straight—stitch ones. Consult your instruction book to see what adjustments must be made. Usually the ‘feed dog’ which pushes the fabric through the machine is disengaged. This may involve the feed being dropped out of the way, or there may be a special cover plate which disengages the feed dog. The fabric is stretched over an embroidery hoop, and the operator manipulates it while the needle sews. If you wish to produce anything elaborate, it's obviously easier to do so with a swing-needle machine. All sorts of effects can be achieved in free hand embroidery—it is possible for example to produce a stitch very similar to the long-and— short stitch used in hand embroidery, and if multicolored embroidery thread is used the result is most attractive. But like any other art, free-hand embroidery is a technique which must be learned by watching a skilled demonstrator, and then practicing with diligence. Appliqué work This can be one of the most attractive forms of machine-sewn decoration, and when sewing machine manufacturers have sample work on display at exhibitions or in prominent stores, it's often the appliqué work which catches the eye. It is frequently used for pictures and framed fire-screens, cushions and table mats, and decorated garments for children. However, it's worth remembering that appliqué is the least practical decoration for washable articles, and is especially impracticable for children’s clothes. Bibs, aprons, dresses and so on have to be washed so regularly that the appliqué work may fray, particularly if, as is sensible, the mother likes to machine—wash as many garments as possible. The same reasoning applies to appliqué for table linen—it is pretty but impracticable, as the sort of washing which will remove food stains will also, very probably, dislodge the appliquéd fabric pieces, not to mention the color bleeding which may result from washing in very hot water. There are different methods of using the sewing machine for appliqué work. One involves cutting out shapes from different fabrics to form the design, then pressing them and tacking and stitching them in place, one at a time, on the main fabric (or fixing them with adhesive, depending on the thickness of the materials used). This is the traditional way of doing appliqué, except that instead of hand- finishing, the zigzag satin stitch on the sewing machine is used to secure and conceal all raw edges. Often a machine-embroidery hoop is used. The other way is to mark the design out line on the back of the main fabric and then to place the appliqué pieces on the right side. The pieces are cut larger than the shapes they are to occupy, and are zigzag stitched from the wrong side of the main fabric. The excess fabric is afterwards cut away on the right side very care fully, with fine scissors. The whole appliqué design is built up piece by piece. Any scraps of fabric, from sheer organdie to thick tweed, can be used to form delightful designs. If you wish, you can ornament the appliqué pieces themselves with one or more of the automatic embroidery stitches if they are available on your machine. For example the petals and leaves of a flower formed from various pieces of fabric may be further embellished with a decorative stitch to form veining and shading. This, incidentally also helps to strengthen the work further. Automatic embroidery If you are going to have automatically embroidered patterns on a garment—for example a blouse or a child’s dress — it will be much easier if you do the embroidery before you make up the garment (unless you plan to use the automatic pattern to embroider decorative seams). Experiment first using odd scraps of the same fabric, folded double, to see which pattern or combination of patterns would best suit the purpose, and to check tension, stitch width and stitch length. Before you start to stitch it's advisable to mark very precisely the lines along which you will be sewing, using faint pencil on fabrics that are washable, and tailor’s chalk on thicker and darker fabrics. If two sides of a garment are to be embellished, measure carefully to ensure that the pattern runs symmetrically, and meets exactly where necessary. Always use identical embroidery thread for top threading and bobbin threading. Machine-embroidered patterns look better on double fabric, and if the material is fine, slip a sheet of typing paper under the fabric too, before you stitch it, to prevent the design from puckering. The paper is afterwards torn off, and any that remains will be washed out when the article is laundered. When you begin a line of pattern, don't begin right at the edge of the fabric, or the raw edges at that point may be drawn down into the needle hole and thus flaw your work. Instead begin at least in. from the edge of the fabric. Make sure, before you begin sewing a long line of automatic pattern, that there is enough embroidery thread on both the spool and the bobbin. If the thread should run out before you have finished, however, it's possible to blend in the continuation in the following way: Remove the work. Take a matching strip of material, re—thread the machine and sew the pattern until you come to the exact place where the stitching ended before. Stop there, raise the needle and remove the material. Put back the original work, making sure that the needle is positioned on the correct side of the pattern so that it will take up the design again, and continue to sew. Some machines have an automatic indicator which enables you to connect up the pattern instantly, and the procedure described will not then be necessary. When you finish a line of pattern, always draw the thread through to the back of the work and tie carefully, making sure not to pull as you make the knot. Snip off the ends. Machine—made patterns can be useful as well as decorative. A number of automatic patterns are ideal for finishing off edges of tablecloths and napkins, and seams can also be finished with embroidery stitches for a pleasing effect— a particular advantage because it avoids the need for seam-finishing. To sum up: advice on the sort of embroidery which is possible with each type of machine should be sought before you make the purchase, as some models are more versatile than others. It is almost always best to have a machine with a three-position needle. I would suggest you ask the demonstrator for special tuition on the kind of embroidery in which you are interested. Many machine manufacturers make a particular point of training their demonstrators in advanced techniques of decorative work. Once you have the knack yourself, you will probably find that your enthusiasm increases and you will want to find new designs to make up. It may be possible to adapt designs which were intended for hand embroidery: the transfer is ironed on to the fabric in exactly the same way. The specialist needlework magazines include designs for machine embroidery from time to time, and the Embroiderers’ Guild (or the Embroiderers’ Guild American Branch Inc.) also produce designs suitable for machine em broidery. CARE AND MAINTENANCE OF THE SEWING MACHINE When you use a sewing machine you should give it the care and attention which are essential to keep it in good running order at all times. Here are the main rules to follow. 1. Cleaning: Keep the machine clean, by dusting off lint and fluff which collect around the moving parts of the machine. A small lint brush moment—perhaps when you are in the middle of a big sewing job and can't get to the shops. MINOR BREAKDOWNS Major breakdowns obviously need professional attention, but not every breakdown is so drastic: the majority of faults are minor, and caused, very often, by misuse. The following check list gives a selection of causes for failure. Run through them before calling in the service mechanic. You may be able to put the trouble right yourself. If the machine will not work at all… * Check whether the electricity supply is getting through (does the electric light on the machine work?). If not, check the wiring of the electric plug, and if this is in order change the cartridge fuse (2 cartridge needed). * Check whether the lead plug is properly connected with the machine—press it home fully. If the machine will not move the fabric, but stitches on a single point… * Check whether the feed dog is disengaged (as though for darning or free-hand embroidery). * Check whether a loose thread is caught on the presser foot. If the needle breaks… * The needle may have been bent or blunt. * The needle may have been inserted wrongly. It may for example not have been pushed into the needle clamp as far as it could go. * You may have been pulling the fabric through instead of letting it pass under the presser foot at its own pace. * You may have used the wrong size needle for the thread and material you are sewing. * You may have machined across too thick a seam (for example an intersecting seam on thick fabric), using too small a needle. * The needle may have struck a wrongly fastened presser foot or attachment. If the bobbin thread breaks * The bobbin thread may have been threaded incorrectly. * The bobbin thread tension may have been too tight, and out of balance with the upper tension. * There may have been a knot in the bobbin thread. * The bobbin may have been wound unevenly so that an overlapping thread trapped the free end. If the needle thread breaks… * The needle may have been blunt or bent. * The machine may have been threaded wrongly; look again at the threading guide. * The upper tension may have been too tight. * There may have been a knot in the needle thread. * The needle may not have been inserted fully into the needle clamp. * The needle thread may have been too thick for the needle. * The needle thread may have been too fine for the fabric. If the top of the work looks normal while the back is a mass of tangled thread * The bobbin was probably inserted wrongly. Re-thread, carefully checking the threading sequence and the position of the thread end. Use a seam unpicker to remove the tangled threads. If the whole machine jams, and needle and bobbin become immovable... * Do not attempt to force the machine to work, either by operating the foot control or manipulating by hand. Disconnect the machine from the electricity supply and if the fabric is still in the machine, gently extricate it if possible by removing needle and fabric together. Then try, gently, to remove the bobbin case from the machine. There may be a piece of cotton jamming it. Clean out the area as much as possible, following the manufacturer’s instructions for cleaning, and re-thread the machine carefully. Re-insert the needle and re-connect with the electricity supply. If the trouble can't be righted, or persists, the fault will probably need professional attention. If the machine misses stitches from time to time… * The needle may be in backwards. * The needle may be inserted wrongly in the clamp; position it as high as it will go. * The machine may be threaded incorrectly. * The needle may be the wrong type for the machine—perhaps too short. Always use the recommended needle. * The thread may be too thick for the fabric. If the machine is sluggish… * It is probably dirty, or needs oiling, or both. |
| PREV: CHOOSING YOUR EQUIPMENT: The right tools for dressmaking and needlework | NEXT: YOUR IMPORTANT CHOICE: Choice of pattern, style, pattern size, fabric and color | Home |
Wednesday, 2020-03-04 8:48


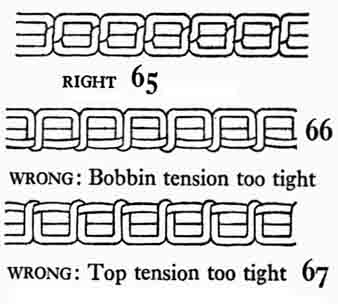 65 RIGHT; 66 WRONG: Bobbin tension too tight;
67 WRONG: Top tension too tight
65 RIGHT; 66 WRONG: Bobbin tension too tight;
67 WRONG: Top tension too tight