Piers can also be made of concrete block, wherever ready-mix concrete is not readily available or the greater ease of construction suggests that this might be a better way to go. Concrete blocks are easy and convenient to handle and the piers are simple to build. They have ample strength to support a log house and there are several pier variations, each with increased strength.
Concrete block piers are built with standard pier blocks that are squared at each end, usually in the 8- x -8- x -16-inch size. Where a great amount of strength is needed, 12-inch blocks can be used, but this is usually not necessary; in any event, the number of piers employed can be increased to provide extra support. Small piers are built by simply stacking a series of blocks, one atop another.
For more strength the hollow cores of the blocks can be filled with concrete or mortar, and a No. 4 reinforcing rod bedded in one or more of the core spaces. A more substantial pier can be made by stacking pairs of pier blocks (stretcher blocks can be used, too, if appearance is not important) with each pair at right angles to the pair below (Fig. 4-25). For yet more strength, fill two diagonally opposite cores with concrete or mortar and embed a length of No. 4 rebar in each. For maximum strength, fill all the cores with rebar and mortar or grout.
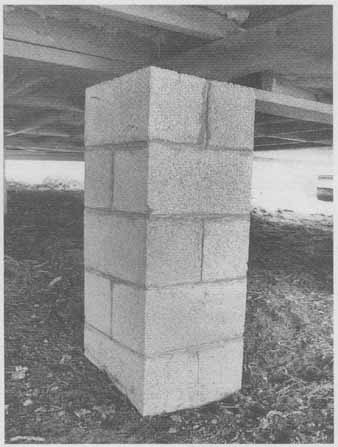
Fig. 4-25. A typical concrete block pier.
Building block piers begins with a series of appropriately positioned holes, just as for the poured concrete piers. Line them up so that the outside edges of the perimeter piers line up with the outside edge of the floor frame or sill. Pour concrete footings, but eliminate the rein forcing bar stubs. After the footings have cured, stack the pier blocks with a ¾-inch mortar joint between each. Cover the next-to-last block with a layer of screening, place the top block, and fill all the cores with mortar. At the same time, embed a sill anchor bolt. Or, if the cores are to be filled full height, do so after placing the last blocks. Scrape away any excess mortar that curls out of the joints as you go along, and tool the joints hard and dense as they begin to set up.
Note that as you dig the pier holes and pour and level the concrete footings, the position of the footing surface relative to the position of the top surface of the completed piers must be exact. All the pier tops must come up to the proper elevation and all be level and in line with one another. And, of course, all the piers must be plumb. You can make slight elevation adjustments as you build the piers by taking constant measurements and slightly thickening or thinning the joints. However, too much of either can weaken the joints. Also, any piers that come out too low can be shimmed, or sills can be notched slightly if some piers are a bit too high. However, accuracy at the out set is important because you don’t have much leeway; shimming and notching should be kept to a minimum.
Allow the mortar joints to cure for at least 3 days, and preferably 5 or 6, before you impose any great weight upon the piers or begin backfilling. A dense and solid backfill can be obtained by shoveling in a foot or so of earth, tamping it firmly with a tamper or posthole bar, and then soaking the dirt with water. When the fill has dried out some, shovel in another foot or so, tamp, and soak once again. Continue until the backfilling is slightly above the finished grade level.