The furnace is by far the most common type of heating system in the country.
In fact, it’s so common that many people use the word furnace to describe any
type of heating equipment.
Furnaces create heat by burning fuel, usually natural gas. Oil and propane
are also used in areas where piped gas is unavailable. By contrast, heat
pumps and electric furnaces use electricity to heat the air; they also use
a duct system to deliver heat, but they are not furnaces and do not have
a fuel supply, chimney, or vent pipe. Boilers burn gas or oil but create
hot water or steam instead of warm air.
Furnace efficiency can be improved by performing regular maintenance, improving air flow adjusting control settings, and sealing leaky ductwork.
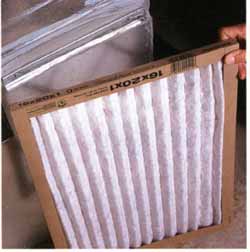
Air filters should be replaced regularly for best furnace
performance. This pleated filter is more efficient than the standard throwaway
fiberglass filter, and it doesn’t cost much more.
Professional Tip: Regular furnace maintenance — including filter replacements, burner tune-ups, and cleanings — is important for safe, efficient operation. What Can Go Wrong: Once in a while, I run into a homeowner who tells me, “I never need to change the filter, because it never gets dirty.” This typically happens when the filter is installed in a filter grille. If the filter isn’t trapping any dirt, it’s because there’s no air going through it — all (or most) of the return air reaching the furnace is being pulled in through leaks in the return duct, or through some other unintentional pathway between the filter and the furnace.
|

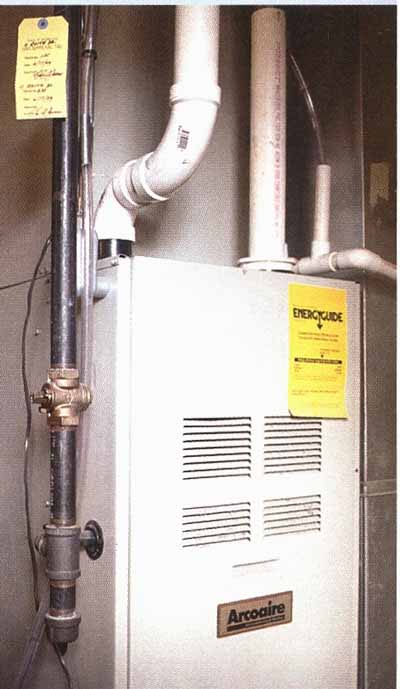
Gas-fired Hot-air Furnace : A furnace directly heats air by
burning fossil fuel, such os natural gas, oil, or propane (liquefied petroleum,
or LP) gas. The air-handler fan creates air pressure to push house air through
the ducts and into the house. Trunk ducts may be made of sheet metal, fiberglass
duct board, or flexible round ducts. Branch ducts are typically made of
round or rectangular sheet metal or flex duct. Return ducts may be a single
central return, as shown here (some bigger homes have two or three), or
may run to every room like the supply-duct system. The furnace may be located
in a basement (as shown), an attic, a closet, or a garage, depending on
the style of house and region of the country.
Components of the Hot-air Furnace:
- The furnace
- Supply register.
- Supply-register boot.
- Flex-duct connector or branch duct.
- Supply trunk ducts carry heated air (red arrows) to house.
- Draft hood and vent pipe take combustion gases directly out of house or to chimney.
- Heat exchangers keep combustion gases separate from house air. Gas burners heat the airstream.
- Blower moves air.
- Best location for balancing damper.
- Return register pulls in house air, (blue arrow).
- Branch takeoff fitting.
- Return duct carries house air to furnace.
Regular maintenance
The first thing you should do to keep a furnace running efficiently is replace the filter. Airflow is important, and a dirty filter cuts airflow In most cases, changing the filter is pretty easy, but some times access can be difficult. During the heating season, the filters should be replaced every month. Stay away from the washable electrostatic filters or other permanent air filters; most of them provide a lot of resistance to air movement, cut ting furnace efficiency. Also, keep the air registers clean and free of obstructions—don’t put furniture over them. Close the dampers on registers only in rooms you do not wish to heat, and even then only if there is no hand damper near the trunk duct.
The next important thing is regular burner maintenance. If you have a gas or propane furnace, you should have it cleaned and tuned every two to three years. An oil-fired furnace should be tuned every year. A hint: Don’t wait until cold weather hits—that’s when the service companies are busy. You may get a better price if you get the tune-up in the spring, just before the heating season is over. Depending on the age of your furnace, you may want to consider a service contract for regular tune-ups and emergency service calls.
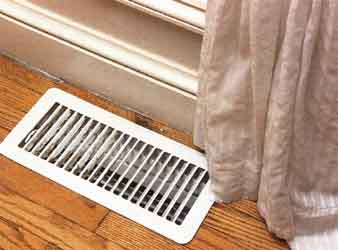
Keep furniture away from furnace air registers, and generally
leave the dampers open for highest furnace efficiency.
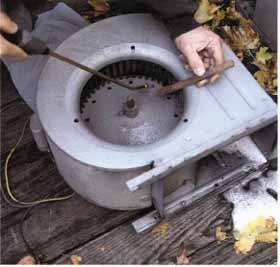
It’s surprising how much dirt and grime can accumulate
on the furnace blower; cleaning the fan blades can make a significant
difference in the airflow.
Furnace Tune-Up A good professional tune-up for a gas or propane furnace includes cleaning the burner and heat exchanger, checking the adjustment of air and fuel flow, cleaning and checking heat exchanger integrity, and testing draft pressure and carbon monoxide levels. The air handler fan should be cleaned and lubricated as needed. In addition, internal controls may be checked and adjusted. A combustion efficiency test before and after the tune-up will give you an idea of how much difference the tune up made, but it won’t account for the benefits of all the improvements. Oil burners are more finicky than gas burners. Most oil furnaces benefit from annual professional service; the burner nozzles, electrodes, combustion chamber, heat exchanger, and flue pipe all need regular cleaning and adjustment. It is common practice to replace oil nozzles and fuel filters regularly. In addition, cleaning and checking heat exchanger integrity, cleaning and lubricating the blower, test ing the flame sensor, and testing combustion efficiency are all important. Try to find a technician who is knowledgeable, methodical, and thorough. If you have an oil furnace, the service technician can also install a smaller oil nozzle. This effectively de-rates, or reduces, the heat output rating of the furnace, better matching it to the house and increasing operating efficiency (later, we will present more about the importance of equipment sizing). Some gas furnaces can also be de-rated, but usually by only 10% to 15%.That won’t improve the efficiency as much as it can for oil-fired equipment, and it must be done carefully. |
Low airflow
One of the biggest furnace efficiency problems is low airflow, which has several common causes, including clogged or dirty furnace filters, dirty fan blades, dirty air-conditioning coils, low fan speed settings, loose fan drive belts, undersized duct work, and duct obstructions.
Diagnosing low airflow is complex, but, once identified, the fixes are usually fairly easy and inexpensive. Other than routine cleaning, most of the fixes need to be performed only once. Most improvements are probably better left to a professional, but it’s good to be informed, because many technicians don’t bother looking for those problems. If a service person is unable to explain in sensible terms what is happening in your system, you may want to get an opinion from another technician.
Before testing airflow, do the obvious things: Replace the filter and clean the blower fan blades, heat exchanger, and air-conditioning coils. Open all the registers in the house that may be closed. Also, check for cycling caused by the high-limit control, a safety switch that protects your furnace and house by turning off the burner if the air gets dangerously hot (for example, if the blower motor suddenly stopped). To do that, set the thermostat high enough to run the furnace for 15 or 20 minutes. The burner should fire immediately; after a brief delay, the blower should turn on. Once the blower starts, the burner should stay on until the thermostat is satisfied (or turned back down). If the high-limit control thinks that the air is getting too hot, the burner will cycle off and on periodically while the blower runs. That could mean the control is broken or set incorrectly or that the airflow is extremely low.
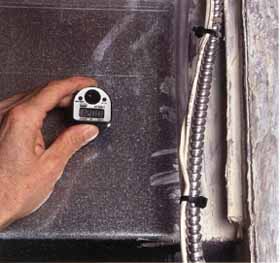
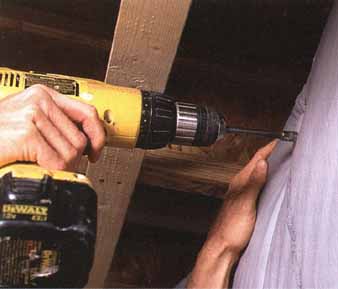
A probe thermometer can be used to check the temperature
rise in a furnace. Be careful locating holes, so that you don’t penetrate
the A/C coils.
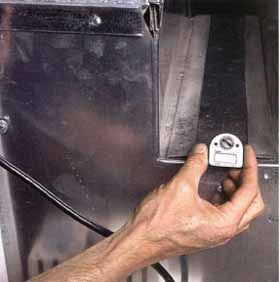
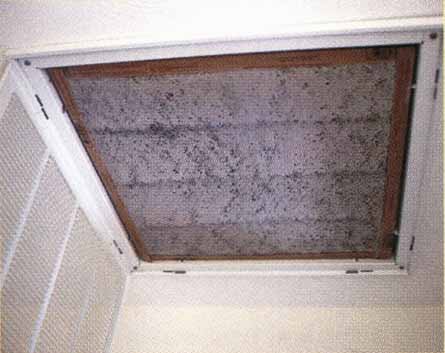
Check the return temperature through a filter slot or
a hole drilled in the duct near the air handler.
If the high limit is working properly, the next airflow test is to measure the temperature rise between the return and the supply airstreams. That can be done by using a probe type of thermometer (a wire thermocouple is better if you can find one) to measure the temperature in the supply and return ducts. The supply temperature must be measured in a main supply trunk duct close to the furnace. Drill a small hole on the supply side, close to the middle of the duct but around the first corner or bend in the main supply trunk from the furnace. Be careful not to drill into air-conditioning coils that may be located in the ductwork just above the furnace.
Professional Tip: Low airflow—which can be caused by dirty filters, undersized ducts, or poorly maintained equipment—is a common cause of furnace inefficiency. More Specifically: If your return-duct system is restricting airflow, installing a grille can significantly increase airflow. But you can’t install a return just anywhere; there must be a clear path for the air supplied to the house to get back to it. The return may suck combustion byproducts from the furnace or water heater down through the chimney. If it is located in an attic, a garage, or a crawl space, the new return will bring cold air into the furnace, lowering its efficiency. You may need to add a duct (well sealed, of course) to a new grille in the house. 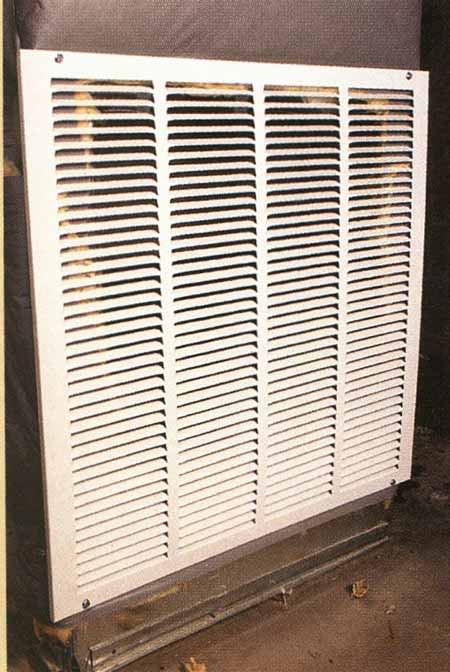 |
For the return temperature, insert the thermometer into the filter slot or a small hole drilled in the middle of the return duct near the furnace. It’s okay to measure the return temperature at the nearest return grille to the furnace, if that’s your only option; insert the probe past the grille.
Again, set the thermostat so the furnace will run continuously for 15 or 20 minutes. After the blower starts, let it run for at least 5 minutes before you measure the temperatures. Hold the thermometer in the return airstream, and then in the supply airstream, long enough for the temperature to stabilize, so you can get an accurate reading. The supply minus the return temperature is the temperature rise; it should be between 40°F and 75°F. Try to get a manufacturer’s specifications for acceptable range of temperature rise. A temperature rise greater than 75°F indicates low airflow, which should be increased to improve efficiency. A temperature rise less than 40°F may result in condensation and rust in the heat exchanger. In that case, the airflow should be reduced.
Many furnace fans have several speed settings; often, a lower speed is used for heating and a higher one for cooling. Airflow can often be increased simply by changing the heating fan speed setting and/or adjusting the belt drive pulleys.
Undersized or restrictive return ductwork, which can severely reduce airflow, is also common but relatively easily diagnosed. Take the cover off the blower compartment door, and repeat the temperature—rise test. If there is a safety interlock switch at the cabinet door, hold it down temporarily with a piece of tape (remember to keep your fingers away from the fan). Now measure the return air temperature at the opening to the cabinet. If the temperature rise drops below 75°F the low airflow is caused by a restricted return duct. If the temperature rise doesn’t change much, the trouble is in the furnace fan or supply ducts.
Undersized return ducts can be relatively easy to fix; sometimes just adding a return grille can make a big difference. Often, though, you’ll need to add extra ductwork with extra supply or return registers. Sometimes, entire sections of ductwork will need to be replaced. Duct upgrades may range from a few hundred to a few thousand dollars, depending on the house.
SAFETY FIRST Don’t attempt to change the fan speed or furnace control settings, or make other adjustments to your furnace or heat pump, unless you understand exactly what you are doing. Always turn off the main power to the unit before opening the cabinet door. And if you aren’t sure, hire a professional service person. |
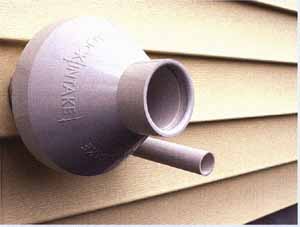
Sealed Combustion One feature that is common in high-efficiency gas furnaces and boilers is sealed combustion. Sealed-combustion appliances draw all their combustion air directly from the outside, usually through a PVC pipe. That makes it virtually impossible to backdraft combustion gases from the appliance. Most oil-fired equipment is not available in a true sealed-combustion configuration, but most burners accept retrofit kits that bring outdoor air through a duct directly to the burner. Both oil and gas systems are also available with induced draft, or power-vent, configurations that use a small fan to send combustion products reliably outside.
|
Furnace control settings
The furnace control can also have a significant impact on efficiency The blower control, located above the heat exchanger, turns on the blower when it senses heat from the burner. It may be right next to the high—limit control or in the same device. The fan-on temperature should be set so the blower comes on between 90°F and 105°F; if it’s set too high, the burner will fire for a long time before the fan comes on. letting excess heat go up the chimney. If it’s set too low, the circulat ing air may feel uncomfortably cool. Attic-mounted furnaces may need higher fan-on settings so the blower doesn’t turn on in the summer. As an alternative, an extra relay may be installed to turn on the fan as soon as the burner fires; that will provide maximum efficiency, if you don’t mind the cooler air at the beginning of the cycle.
The fan-off temperature must be slightly lower than the fan-on temperature: between 85°F and 100°F. The lower it is set, the longer the fan will run at the end of the cycle when the thermostat turns off the burners, taking residual heat from the heat exchanger. If your fan-on and fan off temperatures are fixed (rather than adjustable) and set too high, the control should be replaced. Note that the temperature markings on adjustable controls are often poorly calibrated. Verify the actual fan-on and -off temperatures with a thermometer in the supply duct.
Professional Tip: Sealing a leaky duct system can be the single most effective way to save energy in a home. More Specifically: Another control setting that affects furnace efficiency is the anticipator, which is located inside the thermostat The anticipator does just what its name implies: It anticipates the fact that the room will heat up, then keeps the furnace from running too long and overshooting. The dial should point to the number representing the electric current (in amperes) drawn by the gas-valve circuit. A technician can check the current with an ammeter A lower anticipator setting can shorten run-time and improve efficiency.
|
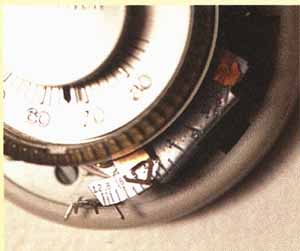
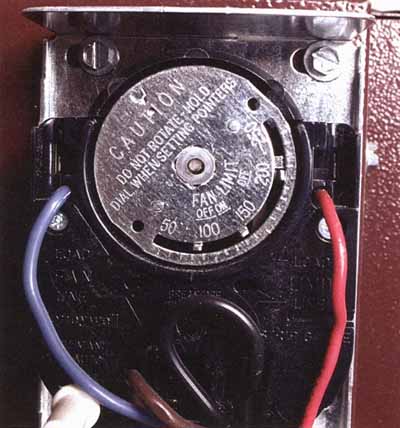
The blower control turns on the fan when it senses heat
from the burner. The fan’s on and off temperatures (the tabs at the bottom
of the dial) must be set properly for maximum efficiency. This one also
has a built-in adjustable peak limit (the tab on the right side of the
dial).
It’s amazing how often I find ducts that are actually
disconnected in attics and basements. Once in a while I even see sections
of ductwork that were never installed.
Professional Tip: If your furnace is in the garage, pay extra attention to sealing return ductwork, so garage air isn’t pulled into the house. What Can Go Wrong: One of the biggest risks in sealing leaky ducts is that you may decrease the airflow, reducing efficiency or even causing damage. If a duct system is undersized, much of the air flowing through the furnace may travel through those leaks, so sealing them has the potential to seriously choke off the air supply to the furnace. Be sure to check the airflow with the temperature-rise test before and after sealing the ductwork. More Specifically: Gas furnaces that have standing ignition pilots may benefit from an electronic pilot, or intermittent ignition device. An electronic pilot uses a spark or hot surface to light the gas burner but uses no fuel when the furnace is off. That may save 2% to 5% of your heating fuel consumption and costs $150 to $250 installed. 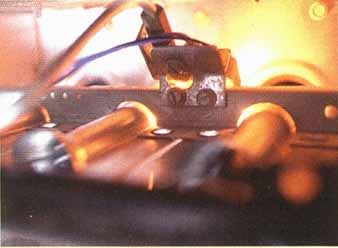 |
Duct-sealing
Air leaks in a ducted distribution system can have an enormous effect on furnace efficiency, health and safety, comfort, and moisture dynamics in a house. The impact of small duct leaks located in fairly tight basements or between interior walls may be fairly small, but poorly designed and installed ducts with major leaks can rob up to 40th or more of your home’s heating energy In fact, sealing a leaky duct system can be the single most effective way to save energy in a home.
Leaky ducts do more than waste energy. Research has shown that they also increase the air exchange in a house by 30% to 300% whenever the air handler is running. That is why furnaces have the reputation for drying out houses in winter. Return leaks in mechanical rooms can backdraft nearby water heaters or even the furnace itself. If the furnace is located in a basement or crawl space, return leaks can also draw in radon gas, water vapor, subsoil pesticide treatments, or airborne molds, distributing them throughout the house. Supply air leaking into an attic or enclosed cathedral ceiling cavity can shoot moisture into those areas at an accelerated rate.
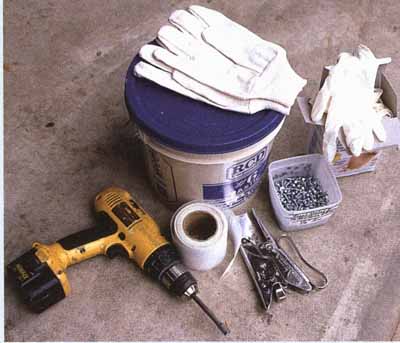
Duct-Sealing Supplies The most important duct-sealing supplies are a good-quality latex-based mastic and a box of vinyl gloves. Fiberglass mesh tape is helpful for reinforcing large gaps and doing structural repairs. A clamp stapler is invaluable for reattaching duct insulation. Sheet-metal screws are handy in many places; I prefer the ones with really sharp points, commonly called Zip screws.
|
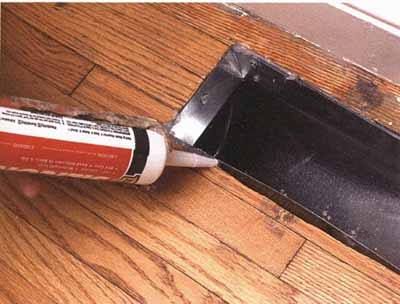
Duct mastic is a nontoxic, latex-based compound that is used
to seal holes, cracks, and seams in ductwork.
Cotton work gloves protect your hands from cuts while applying
mastic; a vinyl glove on the inside keeps the mastic from soaking into your
skin.
If you can reach them, sealing duct leaks is a relatively easy job. Most of the effort involves get ting to the leaks; this can mean some difficult crawling around in attics and crawl spaces or peel ing back duct insulation to get to them. Duct leaks can happen almost anywhere in the system. In addition to connections between duct sections, many sheet-metal fittings have built—in holes and cracks, which should be sealed with duct mastic.
The simplest and most effective way to apply duct mastic is to put on some vinyl gloves, reach into the bucket for a small handful of mastic, and smear it onto the leaky areas. It’s a good idea to wear two or three layers of gloves to protect your fingers from sharp metal edges. If the duct is insulated, be sure to seal the duct itself, not the vinyl or foil facing on the outside of the insulation.
Floor, ceiling, or wall registers exposed to attics, basements,
or other unconditioned spaces may have large gaps that are a big source
of lost energy. Use mastic or caulking to seal the gaps.
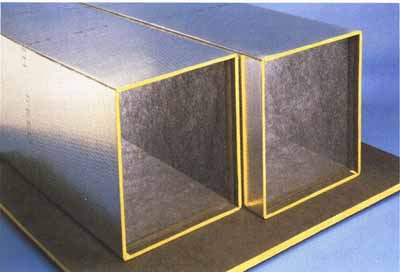
Theoretically, systems made of duct board (a high- density
fiberglass with a foil-scrim kraft facing) can be very airtight but, in
practice, are typically very leaky. Taped joints often fall apart, and the
thin foil surface is fragile and easily damaged during installation or work
by other tradespeople.
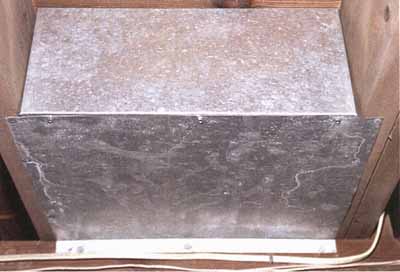
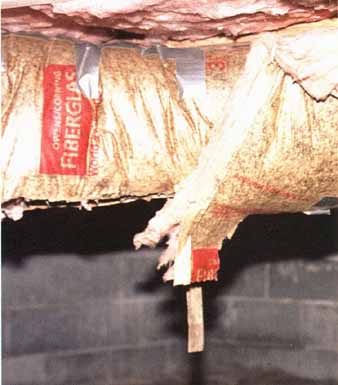
Often, return ducts are constructed from floor-joist bays
with sheet metal panning. Large gaps between the panning sections or at
the end caps are common—I’ve even seen entire pieces missing.
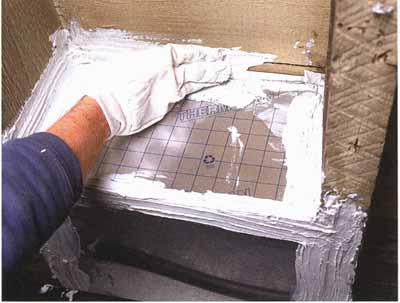
All joints in both supply- and return-duct systems should
be sealed with mastic, including those in duct systems constructed in building
cavities (such as this panned joist bay).

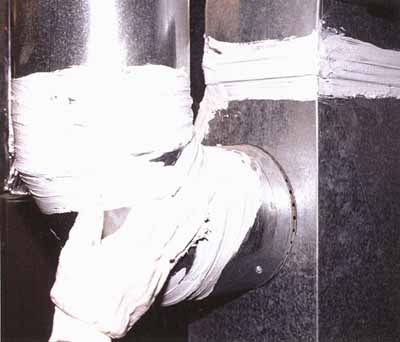
In addition to sealing the joist panning, you must seal the
panned joist bay to the trunk duct. Note the mesh tape embedded in the
mastic for a strong joint.
On the supply side of the system, it is usually fairly easy to follow the duct runs and identify the leakage areas. Places to focus include connections between the main trunk, the duct sections, the end caps on main ducts, and register boots. Swivel elbows and branch-duct takeoffs tend to be par ticularly leaky. Each register boot must be sealed where the branch duct connects to it, at its cor ners and folds, and where the boot meets the dry wall or subfloor. Sometimes, it is easier to seal the boot area from inside the house -- just remove the register grille and reach inside to seal the leaks.
Return ducts can be a bigger challenge. Many return systems are patched together using a combination of plywood, sheet metal, building cavities (including joist bays and wall bays), and a lot of wishful thinking.
In some regions, platform returns—furnaces in a closet or a garage that are mounted on a framed platform on a plywood base with a cutout for the return air common. A return grille is cut into the drywall to allow house air to return to the furnace. Unfortunately, the platforms are rarely sealed and are typically framed in such a way that wall or floor cavities carry return air sucked in from attics, basements, crawl spaces, and garages. It is critical to seal off these platforms from the inside so return air is pulled from only the house.
Many HVAC installers don’t pay much attention to return ducts, thinking they aren’t required to get the air where it’s supposed to go. What they don’t understand is the importance of tightly sealed returns for furnace efficiency, occupant health and safety, and building durability. You must pay atten tion to where the return air is supposed to come from, then get in and seal all the cracks and gaps between return—duct materials. If your furnace is in the garage, pay extra attention to carefully sealing any ducts, especially return air ducts. You don’t want garage air being pulled into the house.
Two places to pay close attention to are the large duct sections connected directly to the supply side and the return side of the furnace (called plenums). The air pressures are highest there because of the proximity to the blower. Any openings in the corners or connections of the supply and return plenums, at the flanges where the plenums connect to the furnace cabinet, at the filter rack, or at the filter cover panel leak the most air because of the high pressure. Use mastic to carefully seal the supply and return plenums, especially any gaps between the filter and the air handler, where dust and dirt can be drawn in past the filter. (Don’t seal the access to the filter, however!) If access is limited, you may need to cut access openings in the duct work or remove sections of ductwork in order to reach the leaky areas.
Professional Tip: Many HVAC installers don’t understand the importance of tightly sealed return ducts. More Specifically: Leaky ducts waste energy in four ways. The most obvious one is that heated air never reaches its destination when it leaks out of supply ducts in attics, basements, crawl spaces, and garages. You paid to heat that air, and now it’s gone for ever. Second, leaks on the return side suck in cold air, reducing the supply-air temperature and the furnace’s efficiency. Third, leaks in the ductwork allow cold air to seep into the house and warm air to escape, just as other leaks in the thermal envelope do (this is true even when the furnace isn’t running). Finally, pressure imbalances caused by duct leaks push air through other leaks in the building. |
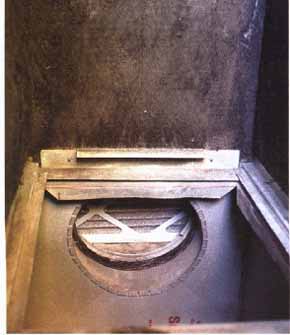
This variation on a platform return is not as leaky
as a plywood platform, but it still leaks badly to the exterior closet
in which it’s located.

An HVAC contractor, building-performance professional,
or home-energy rater uses a duct tester like this one to measure duct
leakage.
Depending on how easy the access is to your duct system, you may want to hire a professional to test and seal your ducts. Building—performance or HVAC contractors use a duct tester, which is hke a miniature blower door (see the bottom photo on the facing page), to pressurize the duct system and measure leakage. If a majority of the ductwork is hidden in walls, cathedral ceilings, or restricted attic areas, hiring someone with an aerosol duct-sealing machine is another option. See www.aeroseal.com for a list of contractors who can provide that service.
Duct insulation
Ductwork that runs through unconditioned space should be insulated, if it is not already. Typically, supply ducts are insulated but often have weak spots at register boots and other major connections. Often, return ductwork is left uninsulated.
Ducts should be insulated with vinyl-faced fiberglass wrap; R-6 is the minimum allowed by most residential codes. However, ducts in attic areas should have higher R-values. Think about it:
In winter, attic temperatures are nearly as cold as outdoors; in summer, they are often much hotter than outdoors (if you have air-conditioning). If the ducts are close enough to the attic floor, cover them completely with loose—fill insulation. If that is not possible, try to find an R-10) or higher duct wrap. Of course, all the duct connections must be tightly sealed before insulating.
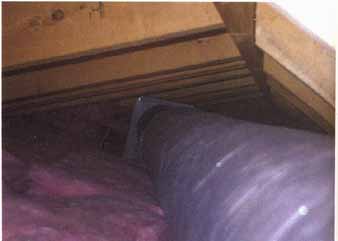
All supply ducts in unconditioned spaces should be insulated
with a minimum of R-6 duct wrap. The wrap should be installed neatly and
snugly, with plastic washers and screws to hold it in place. A clamp stapler
is handy to close the seams.
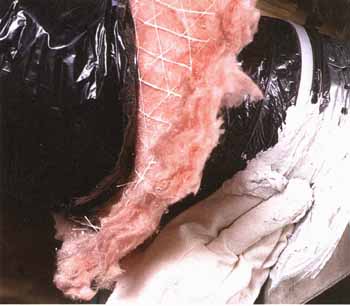
Wrong: Don’t insulate ductwork with material intended
for wall insulation.
Combustion Air
Any atmospheric-vented heating appliance needs adequate air supply for safe and efficient combustion. Codes generally allow one of either two strategies to provide that air. One strategy is to provide a minimum volume of air space around the appliance; it must be unobstructed by partitions, unless there is a louvered door, The other strategy is to supply inlet openings for outdoor air. Both systems are calculated based on the input rating (firing rate in BTUs per hour) of the equipment. A higher input requires more volume or larger openings. Following building code guidelines for combustion air helps but doesn’t guarantee that equipment will work properly. Negative pressures caused by leaky returns, large exhaust fans, or other combustion equipment can still suck potentially deadly combustion byproducts back down a chimney.
Research has shown that passive combustion air inlet openings on the leeward side of a house can become outlets when the wind blows, even causing backdrafts themselves!
One improvement is to build a tightly sealed and insulated mechanical room around the equipment and provide combustion air to just that room, preferably with a motorized damper that opens the air inlet when the burner fires, Fan-powered makeup air kits actively bring in combustion air when the furnace runs, but they can add to the heating load of the building. The best guarantee is to install sealed-combustion equipment. You can also have a building-performance professional or trained HVAC contractor do a com bustion safety test under worst-case conditions to make sure your equipment has adequate draft and produces no carbon monoxide.
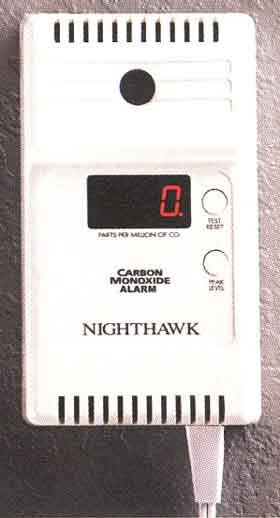
Every home that has combustion equipment, a gas range,
or an attached garage should have one or more carbon monoxide detectors.
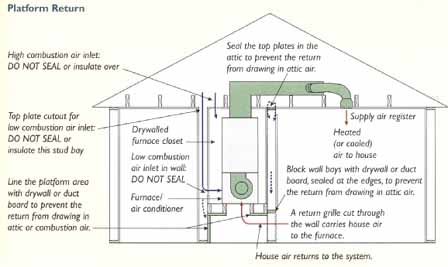
Platform Return: Platform returns can be serious energy
and safety hazards. The dotted lines show potential unintended airflows,
which pull in attic, garage, or outdoor air and also cause combustion
problems by allowing the return suction to interfere with the combustion
air supply.
The platform should be lined with drywall or duct board and all edges sealed thoroughly with duct mastic. Be sure to identify combustion air paths and intentional return air paths, and avoid sealing those.
Some closet furnaces may have a louvered door instead (bringing in combustion air from inside the living space) or grilles that open out through the wall and into the garage or outdoors.
Above diagram shows:
- High combustion air inlet: DO NOT SEAL or insulate over
- Top plate cutout for low combustion air inlet: DO NOT SEAL or insulate this stud bay
- Line the platform area with drywall or duct board to prevent the return from drawing in attic or combustion air.
- Seal the top plates in the attic to prevent the return from drawing in attic air.
- Dry-walled furnace closet
- Low-combustion air inlet in wall: DO NOT SEAL
- Furnace / air conditioner
- Heated (or cooled) air to house
- Block wall bays with drywall or duct board, sealed at the edges, to prevent the return from drawing in attic air.
- A return grille cut through the wall carries house air to the furnace.
- House air returns to the system.
Dotted arrows = Unintentional airflows
Blue arrows = High and low air inlets, which supply combustion air, are required by code for a furnace in an enclosed space.
Next: Heat Pumps