Getting the Room Ready for Floor Installation
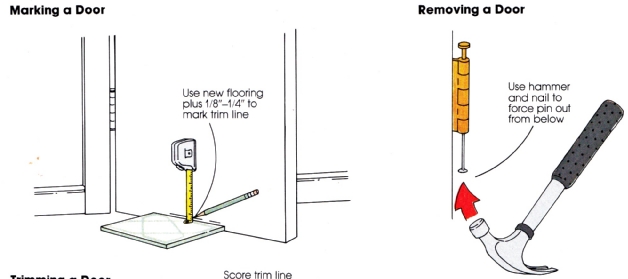
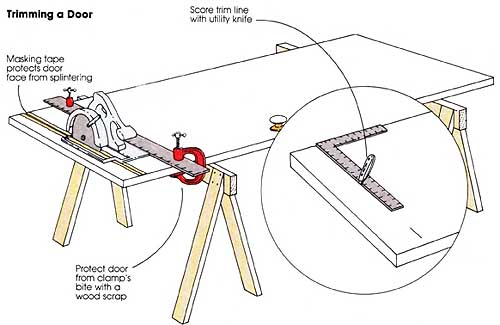
To prepare a room for a new flooring installation, you may have to mark doors to trim them down or remove doors and baseboard. The illustrations below show you how. Marking a Door To trim the bottom of a door, measure up from the existing floor a distance equal to the added flooring height plus 1/8- ¼-inch. Mark this trimline position on the hinge pin side of the door. Removing a Door Remove doors that will get in the way during the installation process. If you need to trim the door because the new material will increase the height of the floor, mea sure and mark the trim-line first (see the illustration below). To knock the hinge pins out, tap them from below with a hammer and 16-penny nail. If there is no access hole in the hinge barrel, place an old screwdriver or dull chisel against the head of the pin and tap it up with a hammer. Trimming a Door To trim, lay the door on sawhorses with the marked side up. Holding a straightedge parallel with the door's bottom mark the cutting line, cover the line with a piece of masking tape-one on each face of the door-to prevent the saw from splintering the wood. Then redraw the line on the tape. Clamp a straight board securely to the door to guide the saw's shoe, and make the cut with a circular saw.
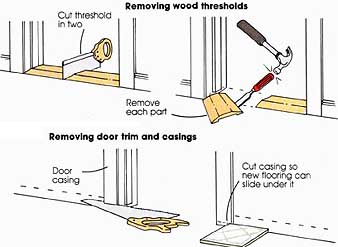
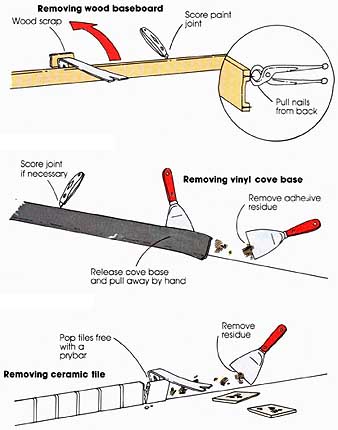
Removing Thresholds Remove thresholds by prying them up from the floor with a metal pry bar. If the door jambs were undercut to house the threshold, saw the threshold into two pieces and re move each piece separately. Undercutting Door Trim and Casings Door trim and casings need not be removed; they can be undercut to allow the new flooring to slip neatly underneath. To do this, lay a piece of new flooring next to the casing, and mark the thickness on the casing. Saw away the casing using a fine-toothed hand saw. Because the saw blade’s kerf—the amount of material the teeth remove—will raise the height of the cut if you saw directly on the line, “save the line” by cutting just below it. Removing Wood Baseboards To remove wood baseboards, hold a thin scrap of wood against the wall, wedge a prybar between it and the top of the baseboard, and gently coax the baseboard away. If the baseboard starts to pull paint off as it separates from the wall, run a utility knife along the joint before prying the rest of the board away. Work your way along the wall, prying at those points where the baseboard is nailed. If you plan to reinstall the baseboard after the floor is laid, number each section as you remove it. Removing a Vinyl Cove Base To remove a vinyl cove base, just loosen it from the wall with a wide- blade putty knife, and strip it away. Scrape the wall with the putty knife to remove any remaining adhesive. Removing Ceramic Tile Base Borders To remove ceramic tile base borders, pop each one loose from the wall using a metal prybar. If you are concerned about scratching or damaging your wall, place a scrap of wood behind the bar, Scrape the wall free of any remaining grout or adhesive.
Prev.: Preparing to Install Carpet |
Thursday, 2013-05-09 6:12