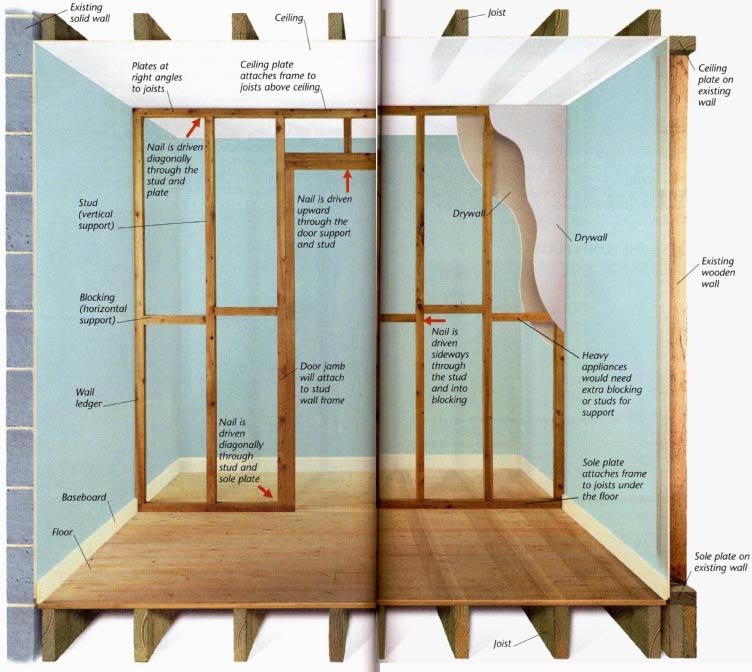
A stud wall is the most common way to divide a room. Its framework is constructed of wood or metal studs strengthened by horizontal lengths (blocking) attached between them. Wires, pipes, and blanket insulation can sit within the cavity between the drywall sheets, which cover both sides of the frame. The wall can be plastered or drywalled and decorated as normal.
Click image or here for full size.
Joist; Ceiling plate on existing wall; Drywall; existing wooden wall;
Nail is driven sideways through the stud and into blocking; Heavy appliances
would need extra blocking or studs for support; Sole plate attaches frame
to joists under the floor; Sole plate on existing wall; Joist
FIRST THINGS TO CONSIDER
Even a minor internal alteration may need planning permission. When planning a stud wall, check the regulations governing lighting, ventilation, and electrical circuits, and get any necessary permits before starting work.
If you need water or electricity in your new room, locate existing pipes and circuits. Work out where appliances such as radiators or sinks should go, so that pipes or wiring are sited where you need them.
CHOOSING DRYWALL AND LUMBER
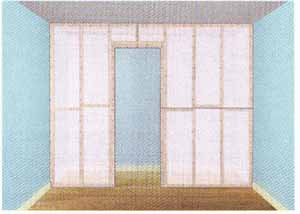
Choosing drywall: Decide how the wall is to be finished, and choose board that's suitable for your plans. Standard drywall is available in sheets of 4 x 8 ft (122 x 244 cm) in size. Seams should not be centered on the wall, and should be staggered. The point is to have as few seams as possible. So, lay a panel to the left of the door with a seam off-centered above the door, and then two horizontal pieces to the right of the door. Then, there are just two seams to finish. Place the boards against the ceiling and leave a small gap at the floor, to be hidden by the baseboard.
Drywall sheets: Larger sheets cover a wall quickly but are harder
to carry and position.
How much drywall to buy
1. Calculate the wall’s area: multiply its height by its width.
2. Divide this by the area of one sheet of your chosen drywall to find out how many sheets to buy. The result will not be exact and , depending on how many cuts you need to make, you may need to buy a little extra to cover the wall, because board edges need to run down the centers of studs, so that hardware can be inserted into the studs.
Choosing lumber: Choose framing lumber (2 x 4 ft or 2 x 6 ft/61 x 122 cm or 61 x 1 83 cm). Check that the wood you buy isn't misshapen: straight lengths are easier to work with, and easier to attach to drywall. See this link for more information on wood.
How much lumber to buy: Measure the length of each stud, plate, and blocking, and add these together for a total length. Remember that wood lengths will not divide exactly into the lengths that you need.
SECURING THE FRAME TO AN EXISTING WALL
A stud wall must be stable. Securing it to masonry should be possible at any point, but secure it to another wood wall at studs. Ideally, a new wall should be secured to the old wall’s top and bottom plate or ceiling joists. Use a stud detector to find the stud nearest to your ideal location. If you must put a wall between studs, place screws at top and bottom, into the ceiling and sole plates, and into central blocking.
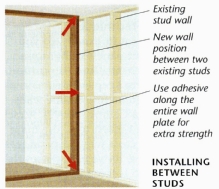
Installing Between Studs: Existing stud wall; New wall position between two existing studs; Use adhesive along the entire wall plate for extra strength.
SECURING THE FRAME TO THE FLOOR AND CEILING
Ideally, plates should cross joists (as shown above). If they run in the same direction, build the wall on a floor joist. There may not be a ceiling joist aligned with this, but the ceiling plate must be attached to a solid fixture, not just to drywall. If you can’t secure it directly to a joist, add blocking every 2 ft (600 mm) between two joists. Secure the ceiling plate to these. This method can also be used on the floor, for instance, if you can't access ceiling joists from above.
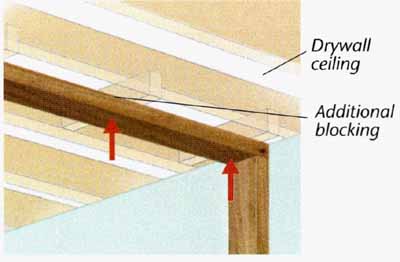
Above: Attaching Ceiling Plate to Support Blocking: Drywall ceiling;
Additional blocking
TURNING A CORNER
A corner is two walls butt-joined. However, on one wall, an extra stud is added close to the corner. This provides strength, and is the securing point for drywall on the inside of the corner, because the main stud is inaccessible from that side. Ensure that the corner forms a precise right angle. Site all sole plates on, or at a right angle to, joists.
PLANNING A METAL STUD WALL
Metal is a modern alternative to wooden studs. Systems differ between manufacturers, but the basics are the same: metal channels and sectional pieces slot together to form a frame. Metal studs may be thinner than wooden ones, but they are just as strong. Preparation and layout for a metal stud wall is the same as for a wooden one. Drywall is screwed onto the metal channels, in the same way as it attaches to wood. See this page for the steps needed to build a metal stud wall.
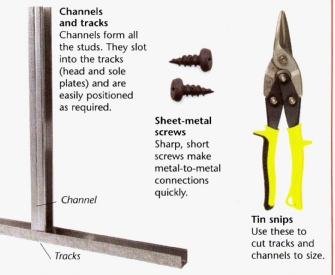
Channels and tracks: Channels form all the studs. They slot
into the tracks (head and sole plates) and are easily positioned as required.
Sheet-metal: screws Sharp, short screws make metal-to-metal connections quickly.
Tin snips: Use these to cut tracks and channels to size.
TOOLS AND MATERIALS CHECKLIST
Building a stud wall: Plumb line or level and chalk, try square, pry bar.
Building a metal stud wall: Tin snips, lengths of lumber, level.