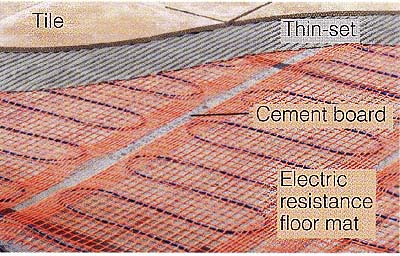
Tile floors are popular in bathrooms for their practicality and durability, but even in mild climates, they tend to be too cold for bare feet. Imagine the comfort of stepping out of the shower onto a warm floor, and you’ll understand why in-floor electric heating systems have become so popular. For small residential spaces, such as bathrooms, simple electric-heating mats borrow the principle of commercial hydronic (water-filled tubing) systems to provide a reliable, affordable heat source.
Embedded in the thin-set mortar used to secure the tile, these mats
feature a continuous loop of resistance heating cable amid a thin plastic
mesh. There are different systems and types of heating cable available,
so shop around. Like other heaters, the system can be controlled by
a thermostat, a timer or even an on-off wall switch. Be extra cautious
during installation to avoid nicking any wires. Insulate under floor,
if possible.
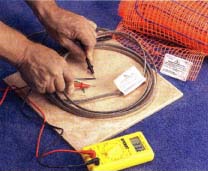
1. Test the heating cable with a volt-ohm meter to make sure the resistance reading is within 10 percent of the rating on the product label. If it’s not, check the manufacturer’s instructions before you proceed. |
 |
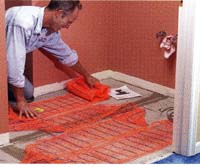
2. After laying a cement-board subfloor, test-fit the mat, making sure the heating cable is at least 4 in. (10 cm) away from any walls, fixtures or cabinets. Do not cut the heating cable or allow it to overlap itself. |
 |
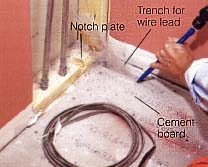
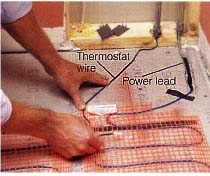
3. Chisel a shallow trench in the cement board near the wall where the line wiring is, to make room for the mat’s thicker wire lead. Also notch the bottom plate for the thermostat cable and power lead. |
 |
4. Secure the mat to the cement board sub-floor with double-sided tape. At the end of each run, cut the mat, not the heating cable itself, so you can fold it over and reverse direction to start the next course. |
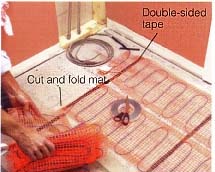 |
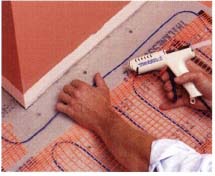
5. For sections where the mat won’t fit, such as around a fixture, cut the plastic mesh away and secure the heating cable to the floor with hot-melt glue. Glue down any loose ends or humps in the mat, too. |
 |
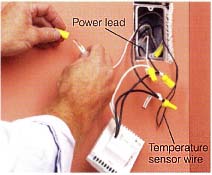
6. Feed the power lead and the thermostat wire through the conduit and to a wall-mounted electrical box. Connect the power lead to the house wiring (it may require a new circuit) and install the thermostat wire and sensor. |
 |
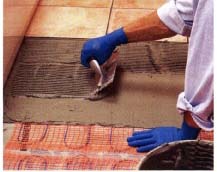
7. With the mat secured, use a notched trowel to apply thin-set mortar to cover it and provide a bed for the tile. Take care to avoid nicking or cutting the heating cable with the trowel’s sharp edges. |
 |
8. After setting the tile and doing another continuity-resistance test, wire the wall thermostat. Shut off power to the thermostat while you’re working on it. Let mortar cure one week before turning on the current. |
 |


